Zabbix is a robust open source monitoring solution used to monitor applications, services, operating systems, network hardware and more. In this guide, we’ll look at how to install and configure Zabbix Server on Ubuntu 22.04.
Step 1: System update
It is always advisable to update the system prior to installation.
sudo apt update & sudo apt upgradeStep 2: Install and configure the database (MySQL)
Zabbix uses a database to store its data. In this step, we’ll install MySQL, configure it for security, then create a database specifically for Zabbix.
MySQL Server installation
Start by installing the MySQL server using the following command:
sudo apt install mysql-serverOnce installation is complete, the MySQL service should start automatically. You can check its status with :
sudo systemctl status mysqlSecuring MySQL
After installing MySQL, we recommend that you secure your installation. This will help you set the root password, remove anonymous accounts, disable the remote root connection, and delete the test database. Run the following command:
sudo mysql_secure_installationFollow the on-screen instructions and answer the questions to strengthen MySQL’s security.
See also: How do I install phpMyAdmin on Ubuntu 22.04?
Creating a database and user for Zabbix
Connect to MySQL’s command line interface using the command :
sudo mysql -u root -pEnter the MySQL root password when prompted.
Now create a database for Zabbix and assign it the necessary rights:
create database zabbix_db character set utf8mb4 collate utf8mb4_bin;Create a database user :
create user zabbix_user@localhost identified by 'password';So don’t forget to replace 'password' with a strong password of your choice.
Give it the necessary rights
grant all privileges on zabbix_db.* to zabbix_user@localhost;Activate the log_bin_trust_function_creators option
set global log_bin_trust_function_creators = 1;And finally, exit MySQL :
quit;Once these steps have been completed, your MySQL database is ready to be used by Zabbix Server.
You can then move on to installing Zabbix itself.
Very important: On the Zabbix server host, import the schema and initial data:
zcat /usr/share/zabbix-sql-scripts/mysql/server.sql.gz | mysql --default-character-set=utf8mb4 -uzabbix_user -p zabbix_dbYou will be prompted to enter your newly created password.
Step 3: Install the Zabbix server
Having prepared the database for Zabbix, the next step is to install the Zabbix server and its web interface.
Add Zabbix repository
To get the latest version of Zabbix, you need to add the official Zabbix repository to your system.
Here’s how to do it:
wget https://repo.zabbix.com/zabbix/6.4/ubuntu/pool/main/z/zabbix-release/zabbix-release_6.4-1+ubuntu22.04_all.debInstall the Zabbix repository:
sudo dpkg -i zabbix-release_6.4-1+ubuntu22.04_all.debUpdate :
sudo apt updateInstalling the Zabbix server and Zabbix agent
Now that the repository has been added, install the Zabbix server and Zabbix agent using the following command:
sudo apt install zabbix-server-mysql zabbix-frontend-php zabbix-apache-conf zabbix-sql-scripts zabbix-agentStep 4: Configuring Zabbix with MySQL
Now that Zabbix has been installed, it’s essential to configure it so that it interacts correctly with MySQL.
Follow these steps to finalize the configuration.
Edit the Zabbix configuration file to tell it how to connect to the database:
sudo nano /etc/zabbix/zabbix_server.confFind and modify the following lines with the correct values:
DBHost=localhost
DBName=zabbix_db
DBUser=zabbix_user
DBPassword=password
Don’t forget to replace 'password' with the password you defined when creating the Zabbix database user.
Start the Zabbix service and make sure it starts automatically on boot:
systemctl restart zabbix-server zabbix-agent apache2
systemctl enable zabbix-server zabbix-agent apache2
Step 5: Frontend configuration
The Zabbix frontend offers an easy-to-use web interface for monitoring your network resources, servers, network devices and more.
Here’s how to configure the Zabbix frontend on Ubuntu 22.04.
Install the package required for the Zabbix frontend using the following command:
sudo apt install zabbix-frontend-phpNormally, packages should be installed by default with zabbix.
Open the php.ini file for the web server you’re using. If you use Apache :
sudo nano /etc/php/8.1/apache2/php.iniFind the line ;date.timezone = and modify it to set your time zone, for example :
date.timezone = Europe/ParisRestart your web server for the changes to take effect.
sudo systemctl restart apache2Step 6: Access the Zabbix web interface
Once Zabbix has been installed and configured correctly, the next step is to access its web interface to start monitoring your infrastructure.
Here’s how to do it:
In your browser’s address bar, enter the URL of your Zabbix server. This will generally look like :
http://ip_server/zabbixReplace ip_server with the IP address or domain name of the server on which Zabbix has been installed.
Click on next step and follow the Zabbix configuration.
Enter database information.
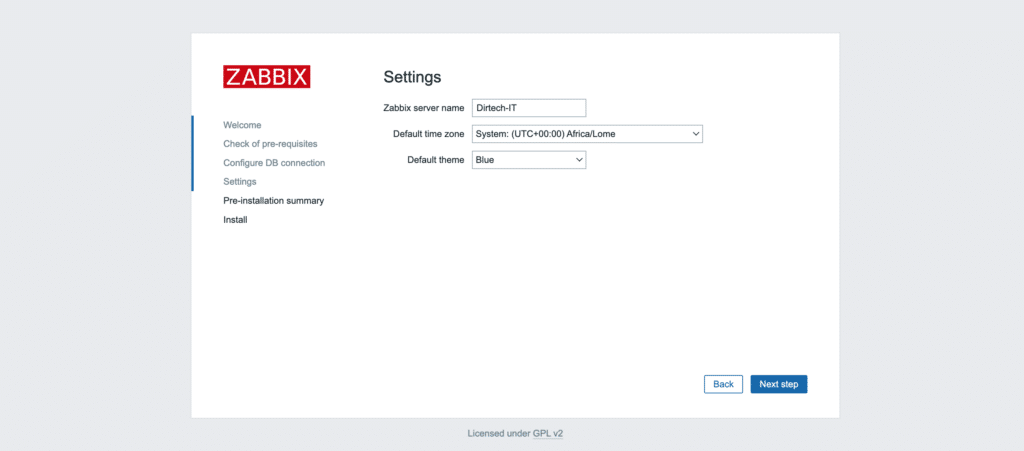
Give your Zabbix server a name.
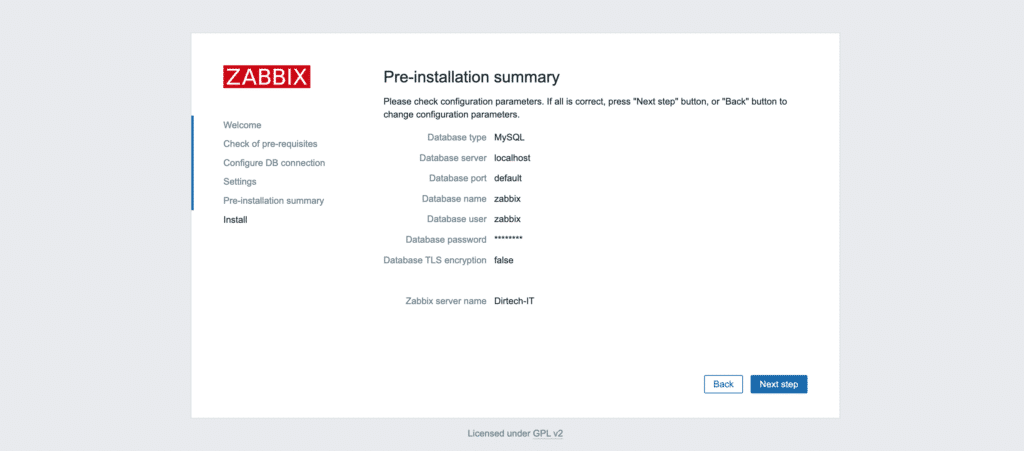
Configuration summary.
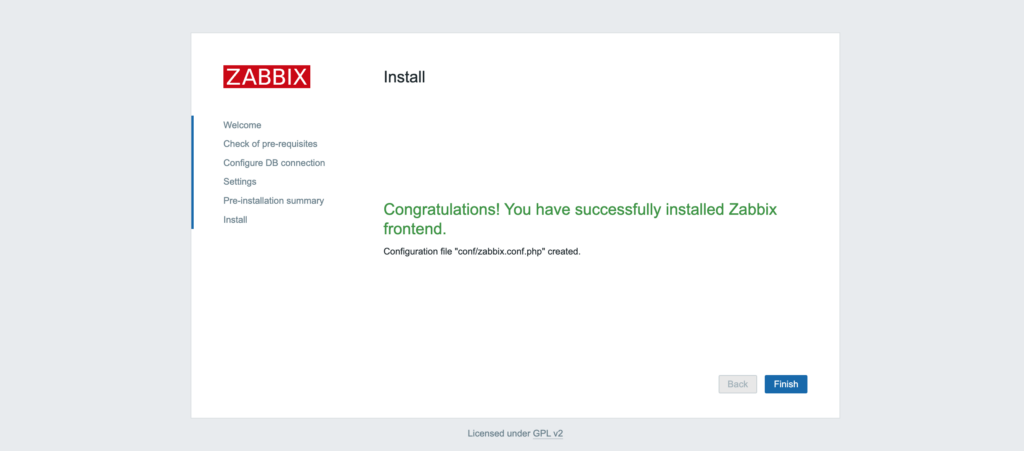
Congratulations, you’ve successfully completed the installation.
Step 7: Connect to Zabbix
Now that you’ve accessed the Zabbix web interface, the next step is to log in and start configuring your monitoring environment.
Here’s how to do it:
On the login page, you should see fields for username and password. If this is your first connection :
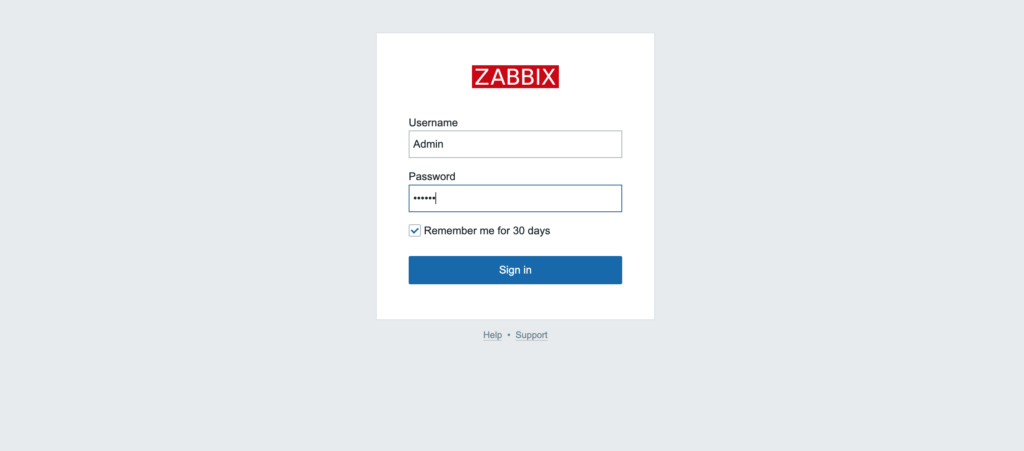
- User name: Admin (with a capital “A”)
- Password: zabbix

We strongly recommend changing the default password for security reasons.
Go to Administration > Utilisateurs, select the Admin user and change the password.
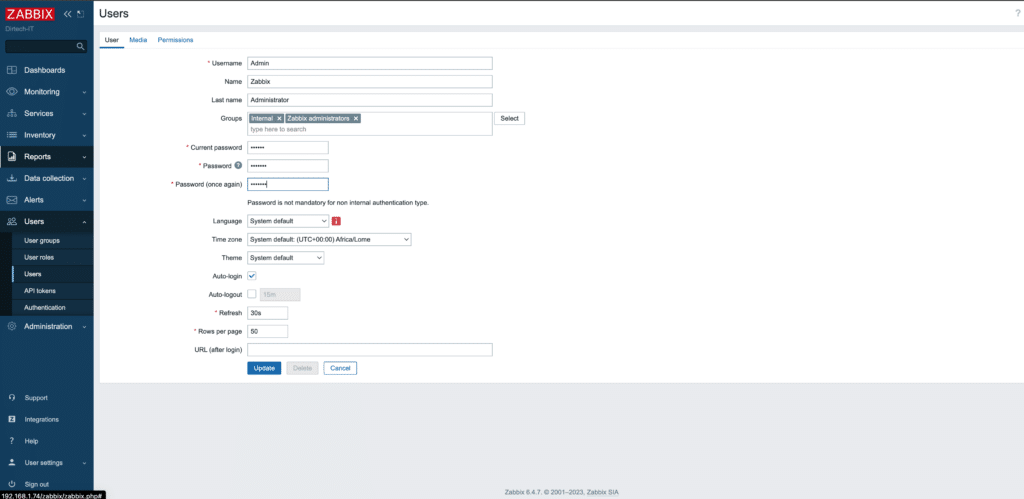
Use at least 8 characters for the new password.
See also: How to install and configure the Zabbix agent on Ubuntu 22.04?
See also: How do I install and configure the Zabbix agent on Windows?
Conclusion
You have now installed Zabbix Server on Ubuntu 22.04. You can now start adding hosts and monitoring your systems and applications.
You enjoyed this article and would like to deepen your knowledge or obtain professional expertise on other topics? I invite you to solicit me on Upwork. It will be my pleasure to assist you.
FAQs
What are the prerequisites for installing Zabbix on Ubuntu 22.04?
You’ll need an updated Ubuntu 22.04 system with root access. Make sure you’ve also installed a web server like Apache or Nginx, as well as the MySQL or MariaDB database.
Can I use a database other than MySQL for Zabbix?
Yes, Zabbix supports several database systems, such as MySQL, PostgreSQL, SQLite, and Oracle. However, MySQL is widely used for its simplicity and efficiency.
How can I make my Zabbix installation even more secure?
Always change the default password, regularly update your system and your Zabbix installation, configure a firewall to limit access, and consider using an SSL certificate to secure communication between server and clients.
Can I install Zabbix on another version of Ubuntu?
Yes, Zabbix can be installed on various Ubuntu versions. However, the steps may vary slightly depending on the version.
Is Zabbix free?
Zabbix is open source and therefore free of charge. However, if you want professional support or additional features, Zabbix also offers paid solutions.
How many hosts or devices can I monitor with Zabbix?
Theoretically, there’s no limit to the number of hosts or devices you can monitor with Zabbix. However, this will depend on your server’s configuration and resources.
How can I add more hosts to monitor?
Once logged into the Zabbix interface, go to Configuration > Hosts > Create host. You can then add the IP address and other details of the host you wish to monitor.