Drupal, a robust and flexible content management system, offers a powerful platform for the creation of dynamic websites. If you’re using Ubuntu, follow this guide. Here’s how to install Drupal on Ubuntu 22.04. With just a few simple steps, you’ll soon have Drupal up and running on your system, ready to meet your web content creation needs.
What is Drupal, anyway?
Drupal is an open-source content management system (CMS) that lets you create and manage websites and online applications.
It is renowned for its flexibility, security and ability to handle large amounts of content. Drupal is like the artist on your digital canvas: it gives you the brushes and colors to create the site of your dreams.
Requirements
Before you start, make sure you have Ubuntu 22.04. You’ll also need a stable Internet connection, disk space and a little patience. Here we go!
Step 1: Preparing the system
Before you start, make sure your Ubuntu system is up to date. It’s like putting your house in order before inviting friends over.
Open your terminal and enter the following commands:
sudo apt update & sudo apt upgradeStep 2: Install the Apache web server
Now let’s install Apache, the web server that will host your Drupal site.
Type this magic command:
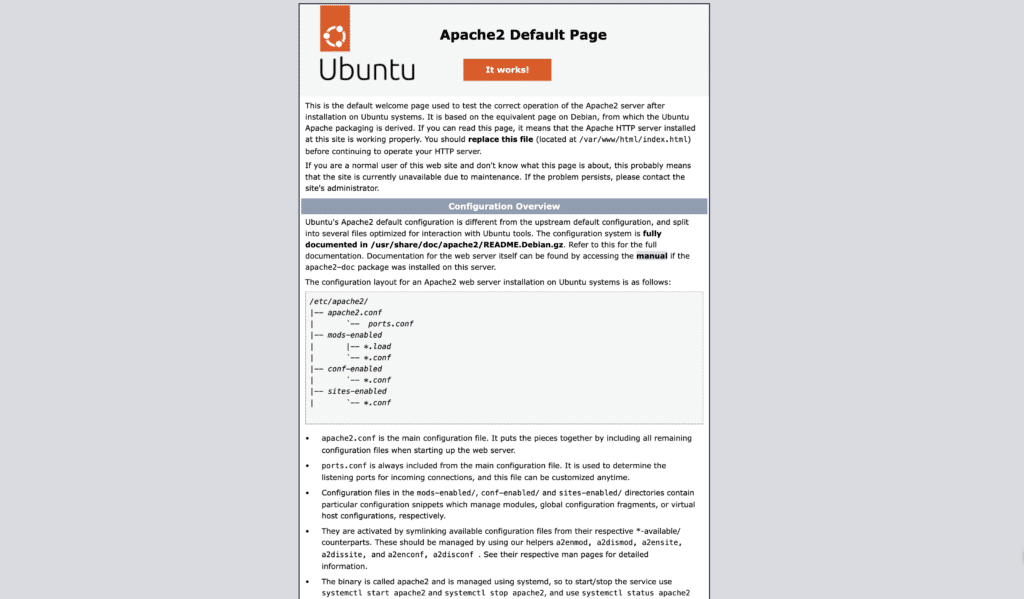
sudo apt install apache2Once installation is complete, you can check the web server by typing your computer’s IP address into the browser.
You will get the following result:
Step 3: Install PHP and its dependencies
Drupal loves PHP, so let’s install version 8.1 and its friends (the dependencies):
sudo apt install php php-{cli,fpm,json,common,mysql,zip,gd,intl,mbstring,curl,xml,pear,tidy,soap,bcmath,xmlrpc}For your Drupal site to run optimally on Ubuntu, it’s important to configure PHP correctly.
Two key elements to adjust are the memory limit and the time zone. Follow these steps to make these changes.
Open the PHP configuration file: Use the nano text editor to open the php.ini file. In your terminal, type :
sudo nano /etc/php/*/apache2/php.iniChange value: Change the value next to memory_limit to increase the amount of memory PHP can use. For example:
memory_limit = 512MHere you increase the memory limit to 512 megabytes, which should be sufficient for most Drupal sites.
Set time zone: Replace the current value with the time zone you want Drupal to use by default. For example:
date.timezone = UTCThis setting sets the time zone to UTC, but you can override it with the one that best suits your location.
Save and close the file: After making these changes, save the file and exit nano.
For these changes to take effect, you need to restart the Apache web server. In your terminal, run :
sudo systemctl restart apache2This restart will apply the new PHP configurations.
Step 4: Install the MariaDB database server
Now that we’ve laid the foundations with Apache and PHP, it’s time to tackle a crucial element: the MariaDB database server.
This is where all your valuable Drupal information will be stored. Think of MariaDB as your website’s vault.
As with the previous steps, everything starts with opening your terminal.
sudo apt install -y mariadb-server mariadb-clientOnce MariaDB has been installed, it’s essential to secure it.
You wouldn’t leave the door to your house open, would you? The same applies to your database.
sudo mysql_secure_installationThis script will guide you through a series of steps to secure your MariaDB installation.
You’ll need to set a root password, remove anonymous users, disable remote root connections and delete the test database.
Here are the questions you will be asked:
dirtech@vm:~$ sudo mysql_secure_installation

NOTE: RUNNING ALL PARTS OF THIS SCRIPT IS RECOMMENDED FOR ALL MariaDB
      SERVERS IN PRODUCTION USE!  PLEASE READ EACH STEP CAREFULLY!

In order to log into MariaDB to secure it, we'll need the current
password for the root user. If you've just installed MariaDB, and
haven't set the root password yet, you should just press enter here.

Enter current password for root (enter for none):
OK, successfully used password, moving on...

Setting the root password or using the unix_socket ensures that nobody
can log into the MariaDB root user without the proper authorisation.

You already have your root account protected, so you can safely answer 'n'.

Switch to unix_socket authentication [Y/n] n
 ... skipping.

You already have your root account protected, so you can safely answer 'n'.

Change the root password? [Y/n] y
New password:
Re-enter new password:
Password updated successfully!
Reloading privilege tables..
 ... Success!


By default, a MariaDB installation has an anonymous user, allowing anyone
to log into MariaDB without having to have a user account created for
them.  This is intended only for testing, and to make the installation
go a bit smoother.  You should remove them before moving into a
production environment.

Remove anonymous users? [Y/n] Y
 ... Success!

Normally, root should only be allowed to connect from 'localhost'.  This
ensures that someone cannot guess at the root password from the network.

Disallow root login remotely? [Y/n] Y
 ... Success!

By default, MariaDB comes with a database named 'test' that anyone can
access.  This is also intended only for testing, and should be removed
before moving into a production environment.

Remove test database and access to it? [Y/n] Y
 - Dropping test database...
 ... Success!
 - Removing privileges on test database...
 ... Success!

Reloading the privilege tables will ensure that all changes made so far
will take effect immediately.

Reload privilege tables now? [Y/n] Y
 ... Success!

Cleaning up...

All done!  If you've completed all of the above steps, your MariaDB
installation should now be secure.

Thanks for using MariaDB!
dirtech@vm:~$
Once you’ve secured MariaDB, it’s a good idea to check that everything is working properly.
Connect to MariaDB :
mysql -u root -pYou will be prompted to enter your root password.
If you can connect without any problems, congratulations! Your MariaDB server is operational.
See also: How do I install WordPress on Ubuntu?
Step 5: Database and user creation for Drupal
Having installed our MariaDB database server, it’s time to prepare the ground for Drupal.
Each web application needs its own data storage space. By creating a database dedicated to Drupal, you ensure clear organization, improved security and simplified management.
To simplify things, you can also use phpmyadmin to create the database. It’s quick and easy.
Read: How do I install phpMyAdmin on Ubuntu 22.04?
But in this tutorial, we’re going to create the database from our terminal.
Connect to MariaDB :
sudo mysql -u root -pEnter the MariaDB root password you defined earlier.
Create the database for Drupal :
CREATE DATABASE drupal;Replace drupal with the name you wish to give your database. It’s like naming your project.
Create a user and assign privileges:
In MariaDB, create a specific user for Drupal. This enhances safety.
CREATE USER 'drupal_user'@'localhost' IDENTIFIED BY 'password';
GRANT ALL PRIVILEGES ON drupal.* TO 'drupal_user'@'localhost';
FLUSH PRIVILEGES;
Replace drupal_user with the username you want and password with a secure password.
Step 6: Download Drupal
Well, we’re now ready for one of the most exciting steps of all: downloading Drupal.
Drupal is standing by on its official website, waiting for you to pick it up. Use this command to download it:
wget https://www.drupal.org/download-latest/tar.gz -O drupal.tar.gzThis command downloads the Drupal installation file directly to your system.
Unzip the downloaded file: Now let’s open the package!
tar -xzvf drupal.tar.gzMove Drupal to the web server directory: Drupal needs to be in a place where Apache can find it and serve it to visitors to your site.
sudo mv drupal-*/ /var/www/html/drupalReplace drupal-* with the name of the unzipped folder, depending on the version of Drupal you’ve downloaded.
Step 7: Create the Apache virtual host file
Before installing Drupal, it’s important to tell Apache how to serve your site. To do this, we’re going to create a virtual host file.
A virtual host allows Apache to manage multiple sites on a single server. Each virtual host has its own configuration, which means you can have several sites, each with its own rules, on a single server.
To ensure that your Drupal site is the only site displayed by your Apache server, it’s important to disable the Apache default page.
Apache has a default site named 000-default.conf. To disable it, use this command:
sudo a2dissite 000-default.confThen restart Apache.
sudo systemctl restart apache2Create a new configuration file for your Drupal site: Use your favorite text editor. Here, I use nano :
sudo nano /etc/apache2/sites-available/drupal.confAdd virtual host configuration: Copy and paste the following configuration into the file. Don’t forget to replace site.com with your real domain name.
<VirtualHost *:80>
    ServerAdmin [email protected]
    DocumentRoot /var/www/html/drupal
    ServerName monsite.com
    ServerAlias www.monsite.com

    <Directory /var/www/html/drupal>
        Options FollowSymLinks
        AllowOverride All
        Require all granted
    </Directory>

    ErrorLog ${APACHE_LOG_DIR}/error.log
    CustomLog ${APACHE_LOG_DIR}/access.log combined
</VirtualHost>
This configuration tells Apache where to find the files on your Drupal site and how to handle requests.
Once you have created and saved the file, activate it with the following command:
sudo a2ensite drupal.confRestart Apache: For the changes to take effect, restart Apache :
sudo systemctl restart apache2Assign appropriate permissions: Drupal needs specific permissions to function correctly on your web server.
sudo chown -R www-data:www-data /var/www/html/drupal
sudo chmod -R 755 /var/www/html/drupal
Drupal works best with the mpm_prefork multi-process manager. Activate it with this command:
sudo a2enmod mpm_preforkEnable PHP module for Apache: Make sure that PHP module 8.1 is enabled for Apache.
sudo a2enmod php8.1Activate the rewrite module: This module enables URL rewriting, an important feature for Drupal.
sudo a2enmod rewriteNow activate the site configuration you’ve created for Drupal.
sudo a2ensite drupal.confRestart Apache: For all these changes to take effect, restart the Apache server.
sudo systemctl restart apache2Step 8: Finalizing the Drupal installation
We’re on the home stretch now: finalizing the installation of Drupal on your Ubuntu 22.04 server.
The first step in completing the installation is to access Drupal via your browser.
Type the URL (or IP address) of your site in the browser address bar. If you have correctly configured your Apache server and virtual host, you should see the Drupal installation page.
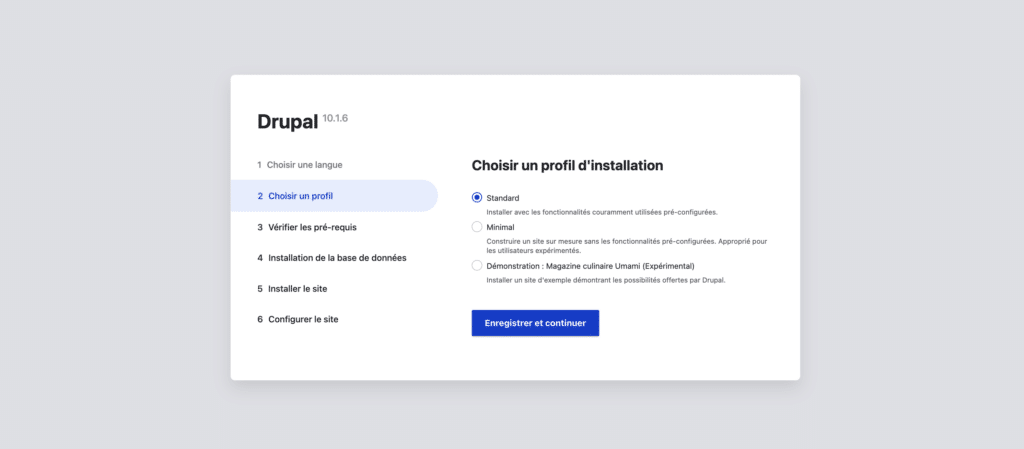
Choose language: Drupal lets you select the language of your administration interface.
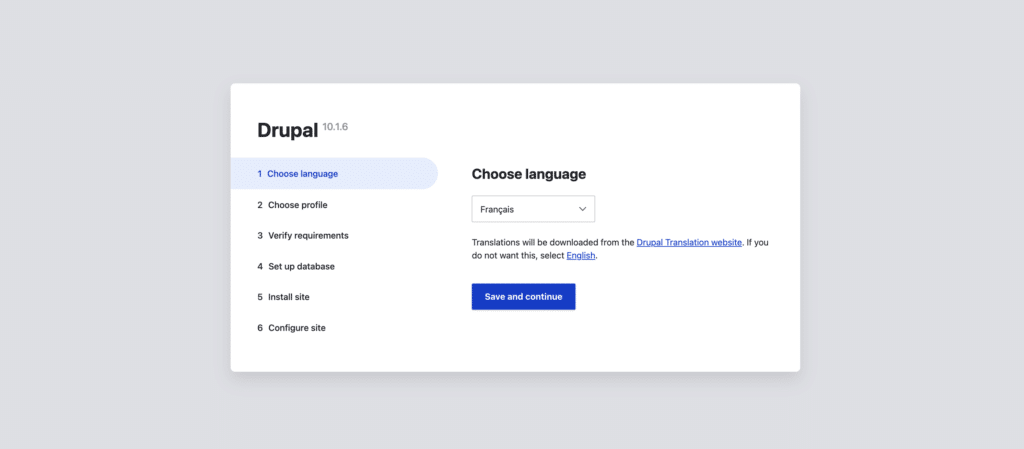
Keep the standard installation.
Configure database: Enter the details of the MariaDB database you created earlier (database name, user name, password).
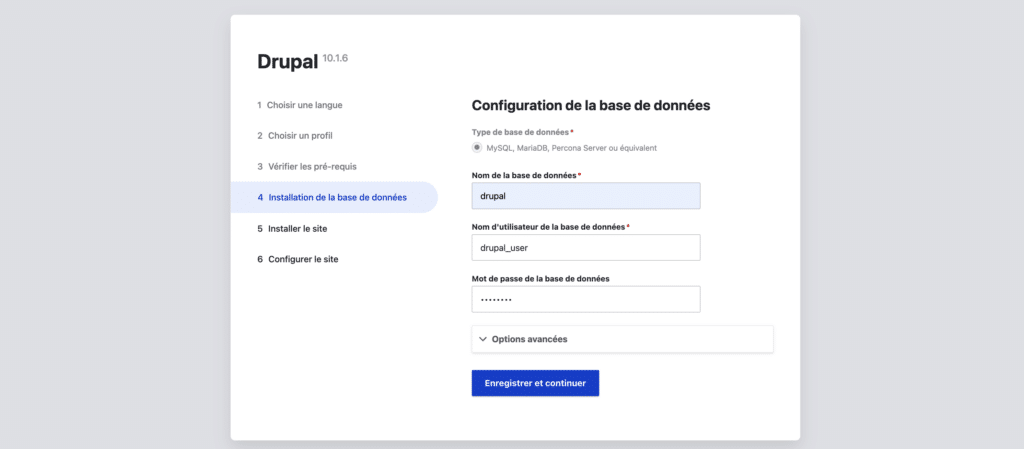
Drupal will install the modules required for the basic operation of your site.
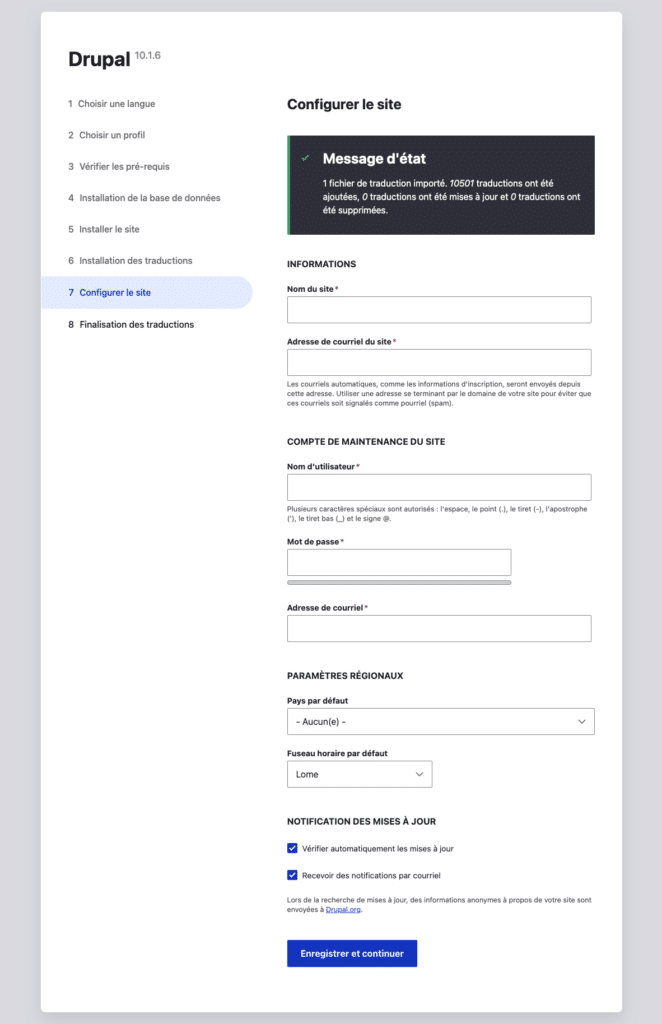
Site configuration: You’ll need to enter information such as site name, email and administrator details (username and password for the administrator account).
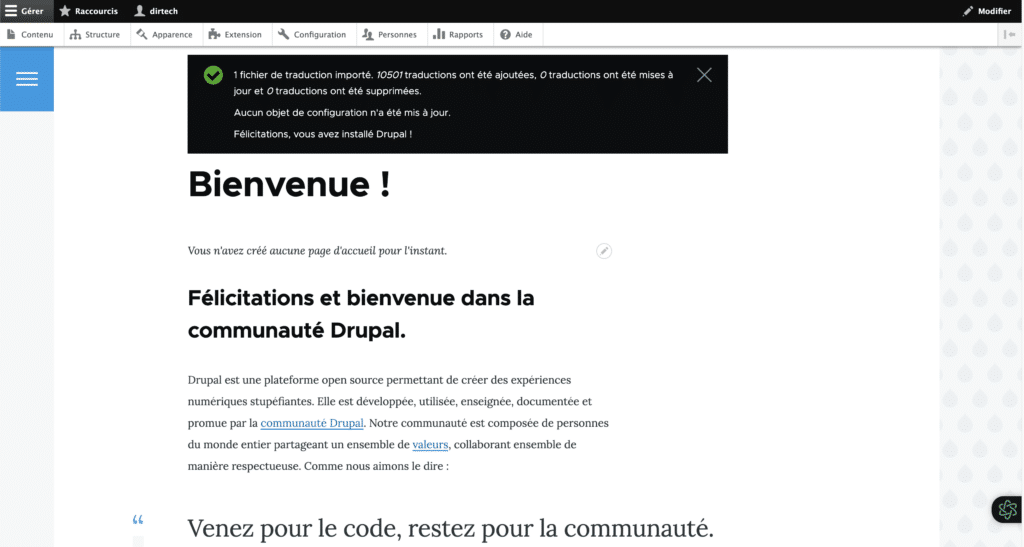
Once installation is complete, Drupal will redirect you to the login page. Use the administrator account details you’ve created to log in.
FAQs
Can I use MariaDB instead of MySQL for Drupal?
Yes, Drupal is compatible with MariaDB. In fact, MariaDB is often preferred for its performance and compatibility with MySQL.
Can I use a different theme for my Drupal site?
Yes, Drupal offers a wide variety of themes that you can use to customize the look and feel of your site. You can choose from the themes available in the Drupal directory or download new ones.
How do I access the Drupal administration dashboard?
After installation, you can access the Drupal administration dashboard by visiting your site followed by /user (for example, http://monsite.com/user). Log in with the administrator credentials you created during installation.
Do I need to update Drupal and its modules regularly?
Yes, it’s crucial to keep Drupal and its modules up to date for reasons of security and functionality. Drupal will inform you of available updates in the administration dashboard.
How do I back up my Drupal site?
We recommend that you make regular backups of your Drupal site. You can use the backup modules available in Drupal or perform manual backups of your files and database.
Is Drupal suitable for high-traffic sites?
Yes, Drupal is designed to handle high-traffic sites efficiently, thanks to its ability to scale and its many caching and optimization options.
Conclusion
Installing Drupal on Ubuntu may seem complex at first, but by following the right steps, you’ll discover a world of possibilities for creating a powerful, personalized website. Good luck with your Drupal projects, and don’t forget that every problem you encounter is an opportunity to learn and grow in the exciting field of web development.