In a previous article, we have seen the installation of CyberPanel and how to add a website to it. In this article, we will configure the email server on CyberPanel step by step to send and receive emails easily.
Create a website for email server
Before setting up an email server on CyberPanel, you need to add a website (domain name). When adding a website, make sure to check DKIM Support and Create Mail Domain for mail management.
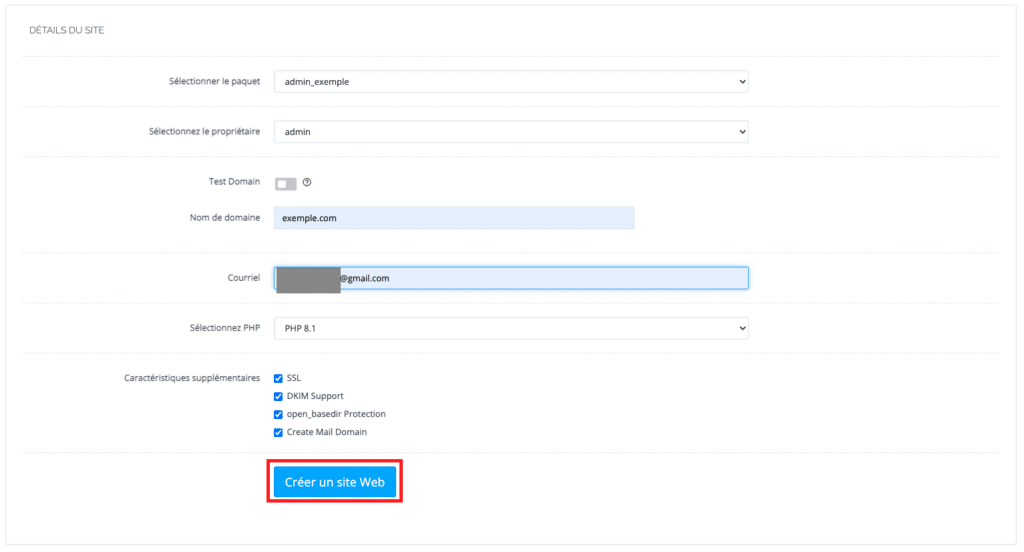
DKIM Support: If you check this section, CyberPanel will automatically create a DKIM for the domain’s email.
protection open_basedir : website protection function
Create Mail Domain : CyberPanel will create an email subdomain to manage emails
Make sure you have integrated CyberPanel – Cloudflare to avoid configuring DNS records manually.
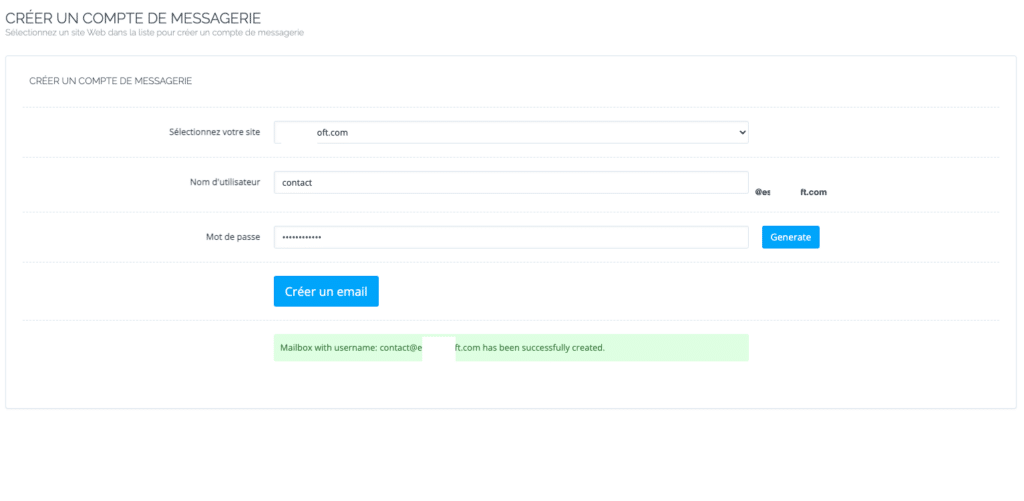
Create an email account on CyberPanel
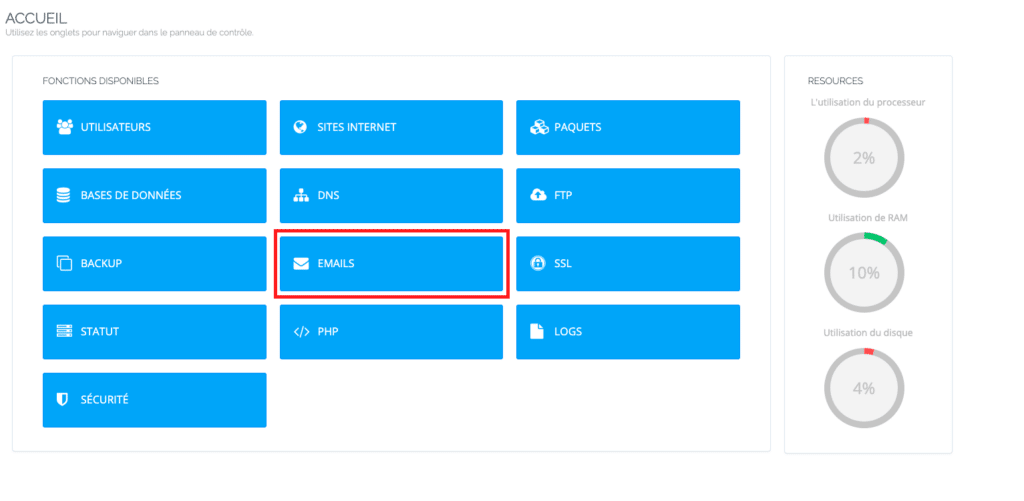
Once you have added a website and configured the DNS records, you can now create an email account.
To do this, in the dashboard, click on EMAILS.
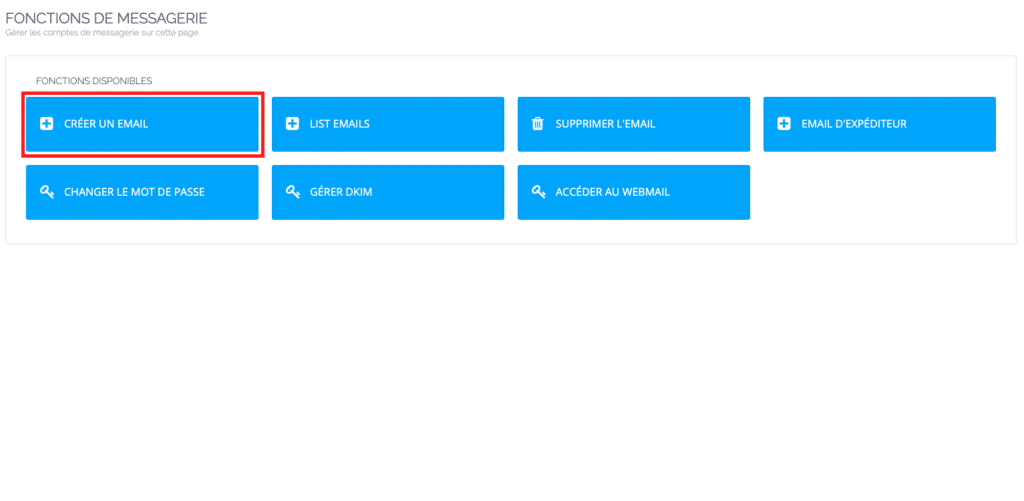
Then click on CREATE EMAIL.
You will select the domain and give the username for the email address. In the example below, the username is contact to have an address [email protected]. And don’t forget to set the password and then create an email.
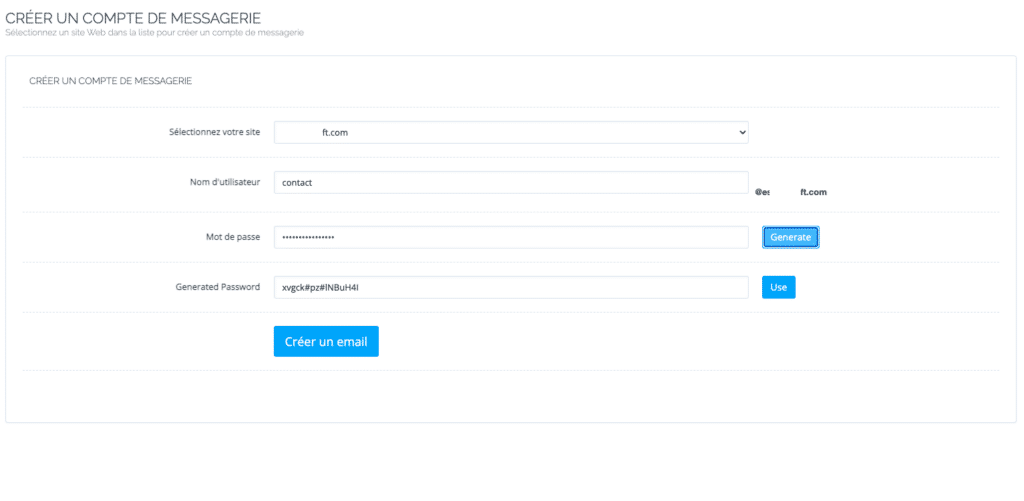
And now you have just created an email address.
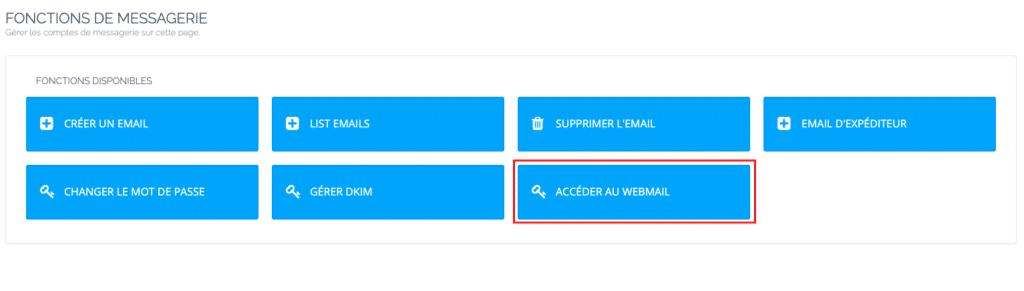
Access to the Webmail
To check your Webmail, go back to the home page and click again on EMAILS in the menu. Then, ACCESS THE WEBMAIL.
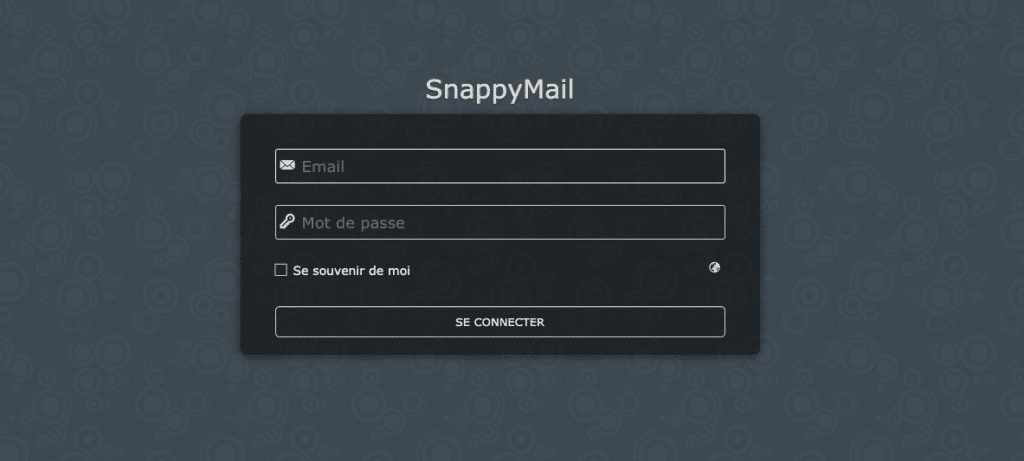
On this page, you can enter your e-mail address and the password you have chosen to connect to the webmail.
Configure third-party email clients
While webmail offers some convenience, it is not always the preferred method of email access for everyone.
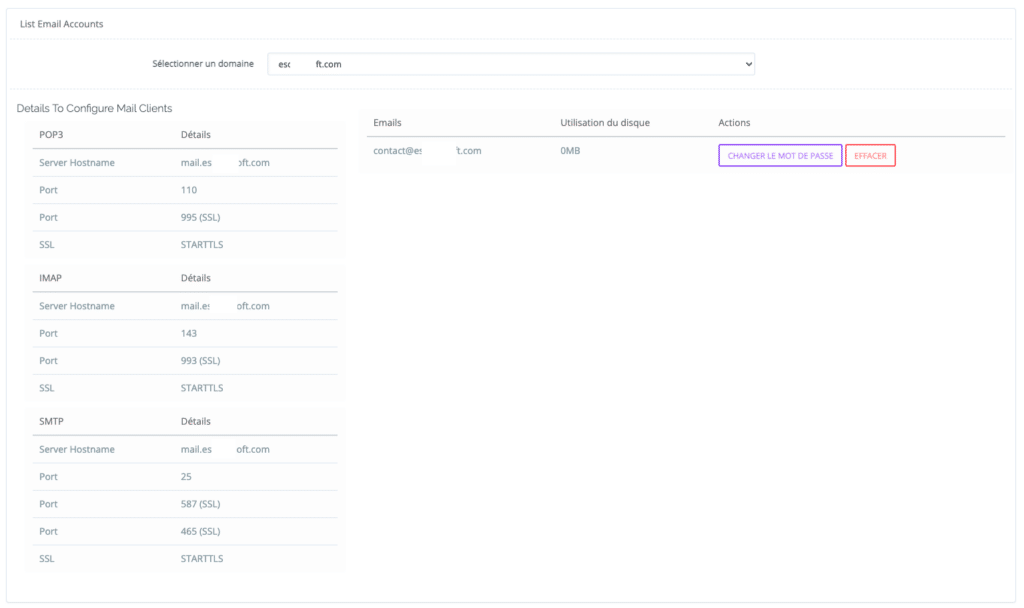
To configure email clients, you will need to know the server information to use in their desktop or mobile email clients. We can mention Outlook, Thunderbird, MailSpring, etc. You can find this information as follows:
On the dashboard, click on EMAILS then LIST EMAILS and select the domain name you want to use.
By following this step-by-step guide, you have successfully configured the CyberPanel email server to send and receive emails. Now you can take advantage of CyberPanel’s messaging capabilities to effectively manage your electronic communications.