Would you like to improve the security of your IT network, but don’t know where to start? Look no further! Our step-by-step guide shows you how to install and configure OPNsense on VirtualBox in just a few simple steps.
Whether you’re a novice or an experienced network security expert, follow us step-by-step to create your own firewall with OPNsense. Get ready to discover a powerful and flexible solution to protect your IT infrastructure.
Installation preparation
Before diving into OPNsense installation, make sure you have everything you need.
Here are the steps to follow to prepare yourself effectively:
Start by downloading and installing VirtualBox on your system. VirtualBox is free, open-source virtualization software that lets you create and manage virtual machines.
Visit the official OPNsense website to download the ISO image of the latest version. Make sure you choose the right architecture for your system.
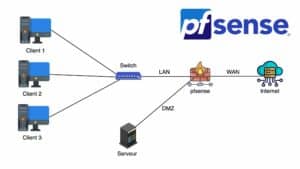
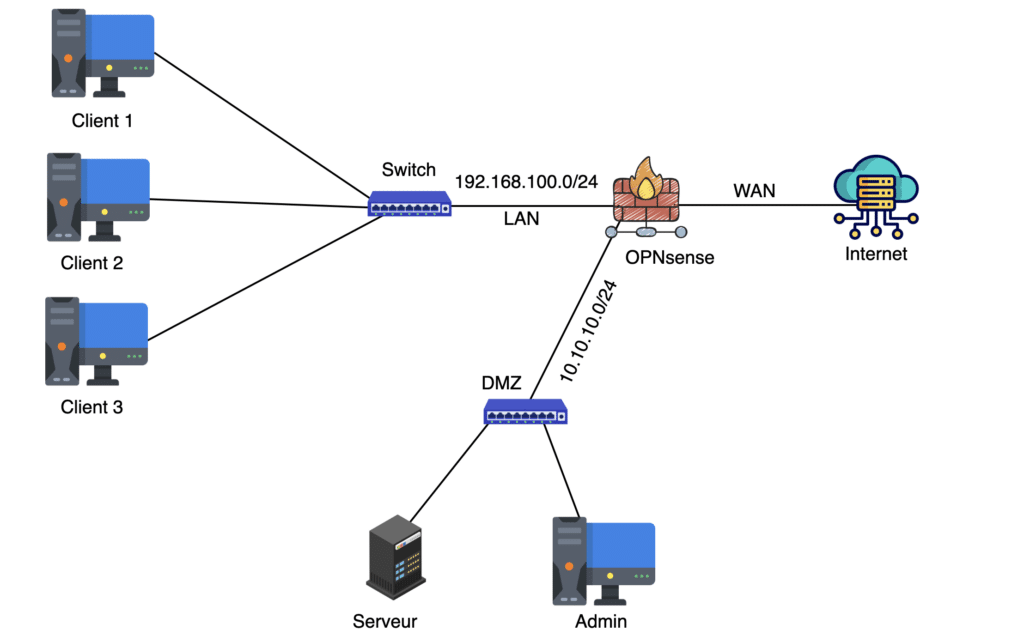
This is what our topology looks like:
Step 1: Create an OPNsense machine on VirtualBox
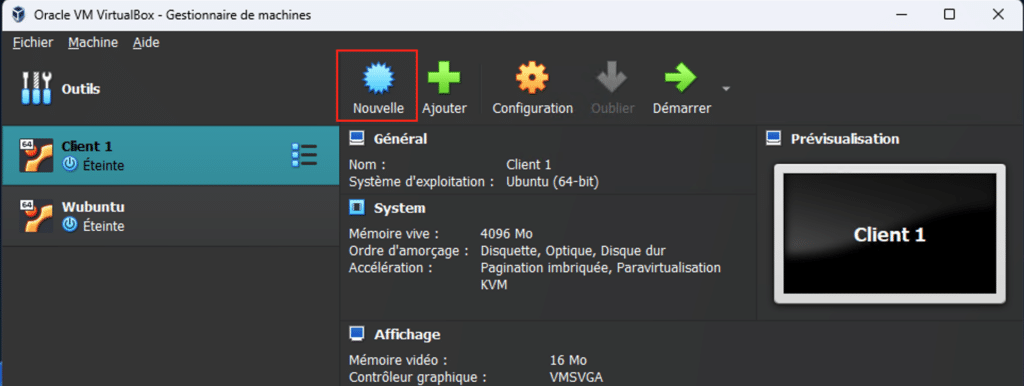
Start by opening VirtualBox on your computer.
Click on the ‘New’ button in the VirtualBox toolbar to start the process of creating a new virtual machine.
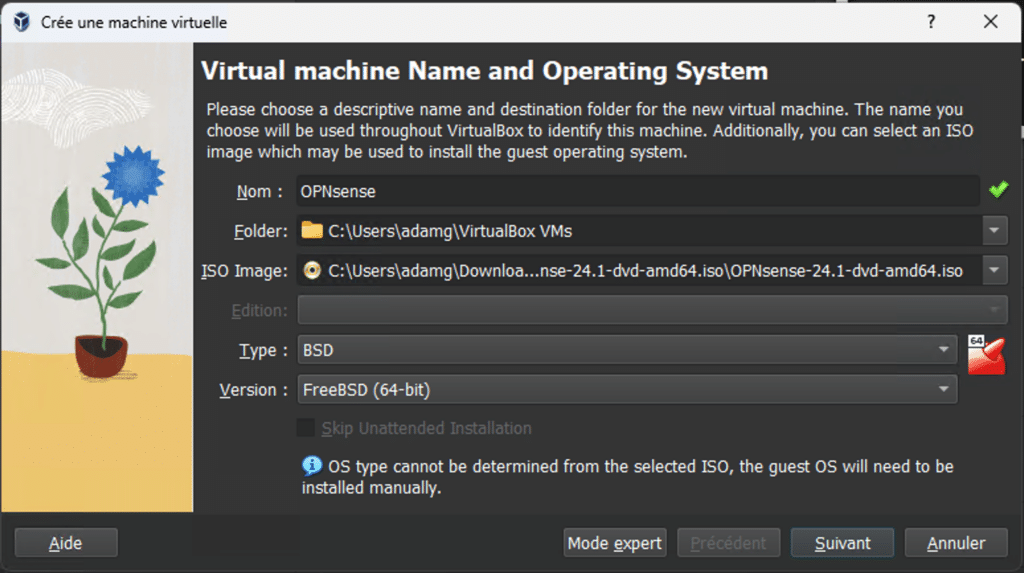
In the virtual machine creation window, enter a meaningful name for your OPNsense machine
Select operating system type ‘BSD’ and version ‘FreeBSD (64-bit)’. OPNsense is based on FreeBSD, so this selection is appropriate.
Allocate the amount of RAM you want to use for your virtual machine. Make sure you allocate enough RAM for optimum performance, but don’t exceed the limits of your host system.
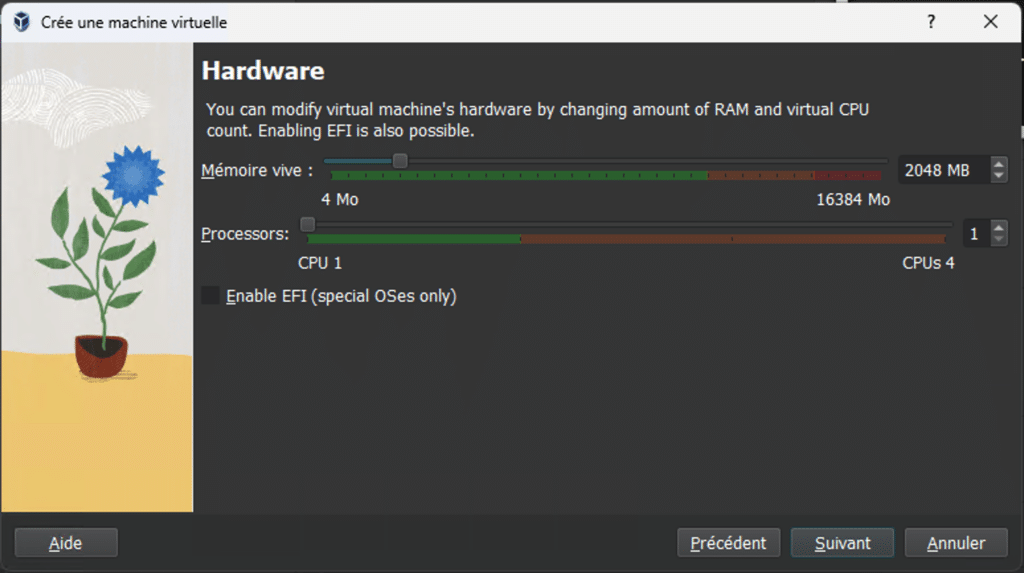
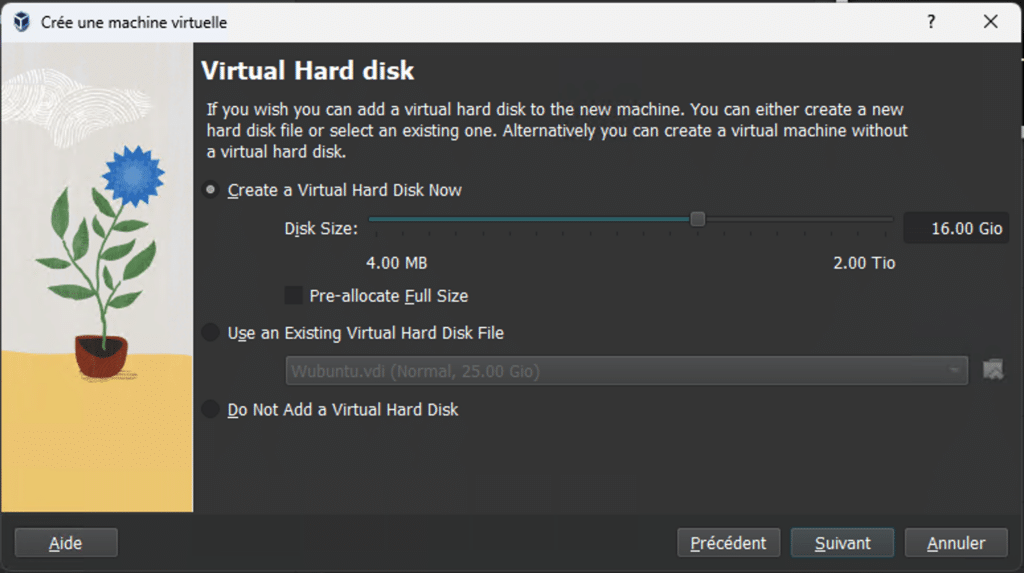
Set the size of the virtual hard disk. OPNsense generally requires minimal storage space, so allocate enough to suit your needs.
Step 2: Configure network interfaces
Now that you’ve created your OPNsense virtual machine, it’s time to configure the network interfaces to enable OPNsense to communicate with your virtual network and LAN.
In VirtualBox, select your OPNsense virtual machine from the list of machines.
Click on the ‘Configuration’ button in the VirtualBox toolbar to open the virtual machine settings.
See also: How do I configure a pfSense LAB with VirtualBox?
In the virtual machine settings window, click on the ‘Network’ tab.
Under the ‘Network’ tab, you’ll see a list of virtual network adapters associated with your virtual machine. By default, there should be a NAT network adapter.
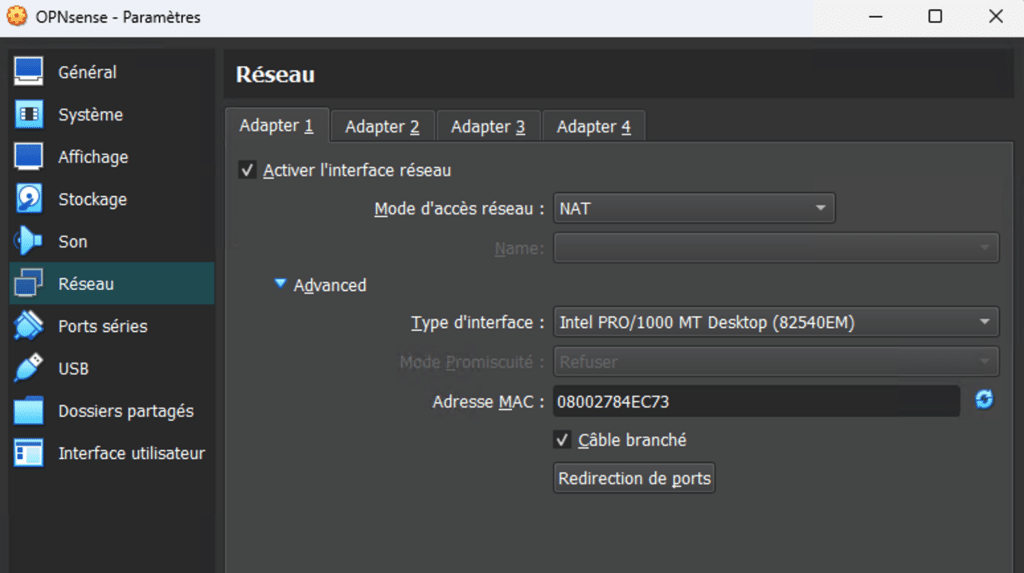
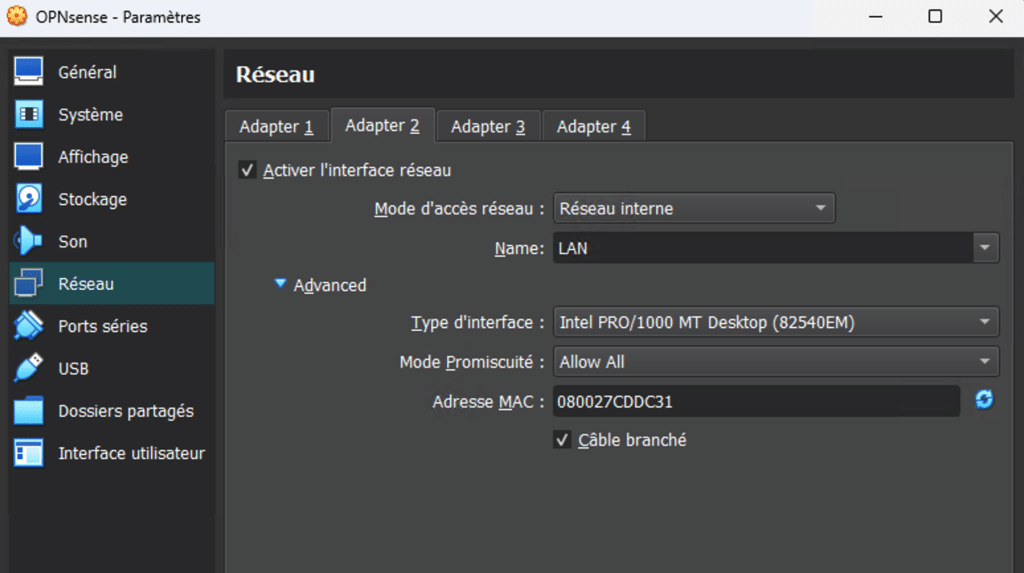
For interface 2 :
And finally for interface 3 :
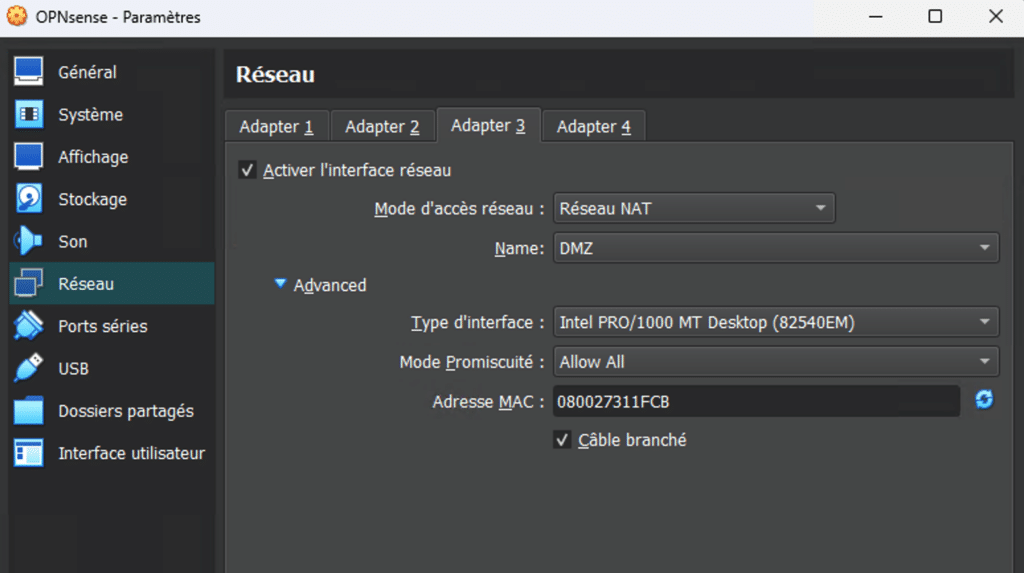
Once you’ve configured the network interfaces as required, click on ‘OK’ to close the virtual machine settings window. Your OPNsense virtual machine is now ready to be started and configured.
Step 3: Install OPNsense
Now that the network interfaces have been configured, you can proceed to install OPNsense on your virtual machine.
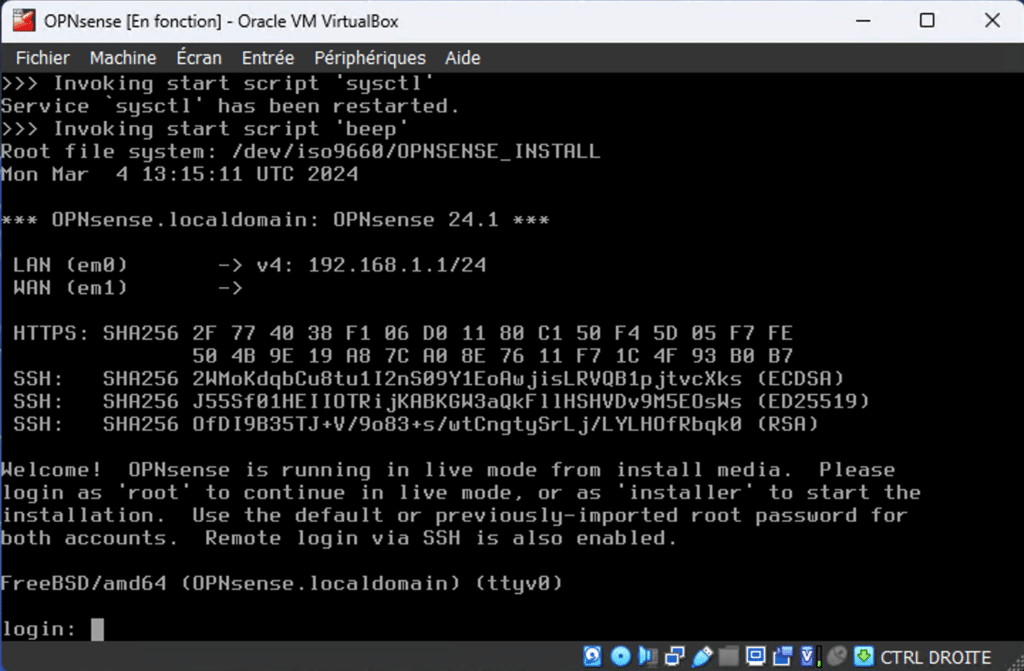
Start your OPNsense virtual machine by clicking on the ‘Start’ button in VirtualBox.
When the virtual machine starts up, it should boot from the OPNsense installation media you previously mounted (e.g. an ISO file).
Log in with the ‘installer’ account, default password: opnsense.
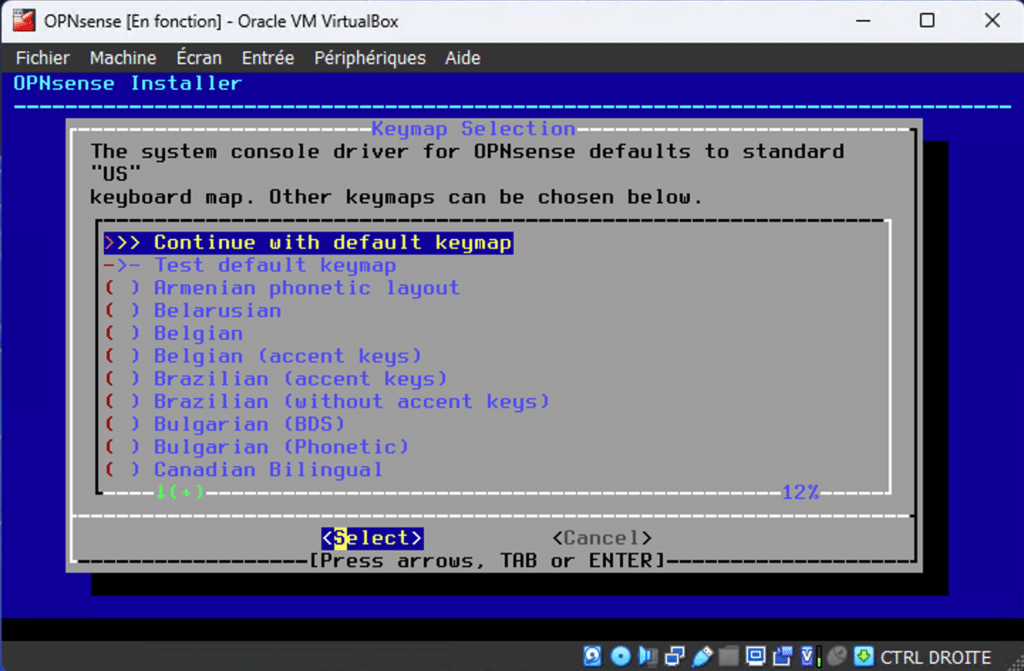
Continue installation with default options.
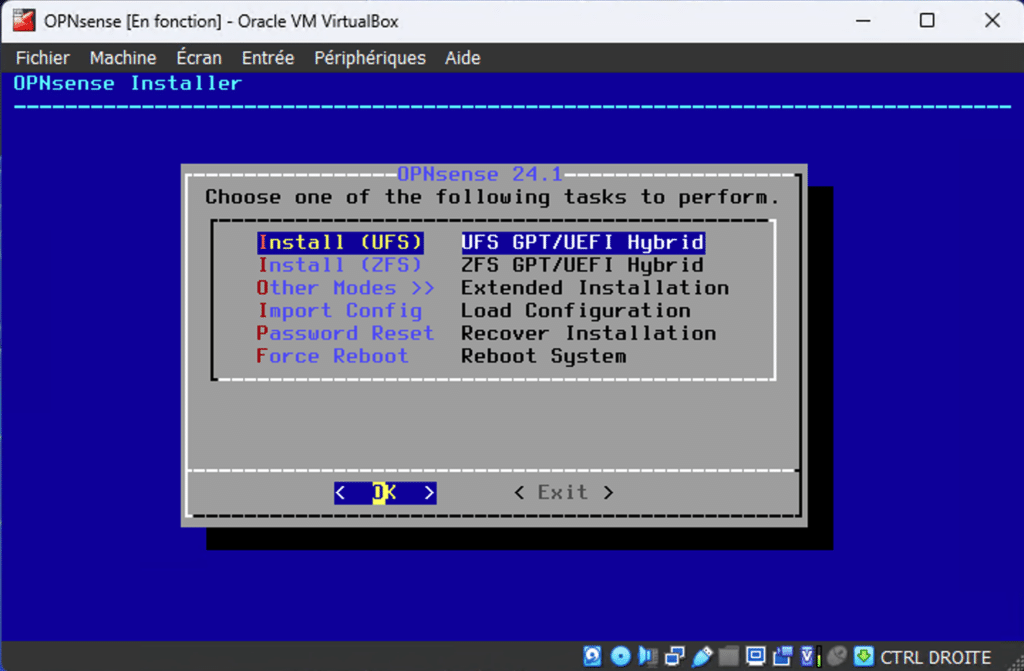
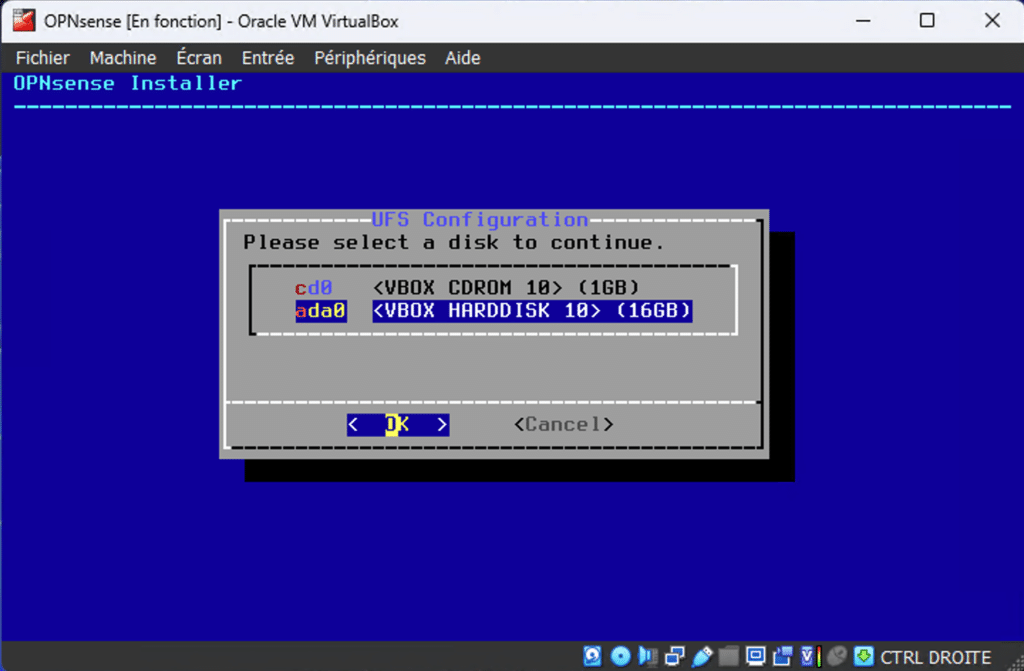
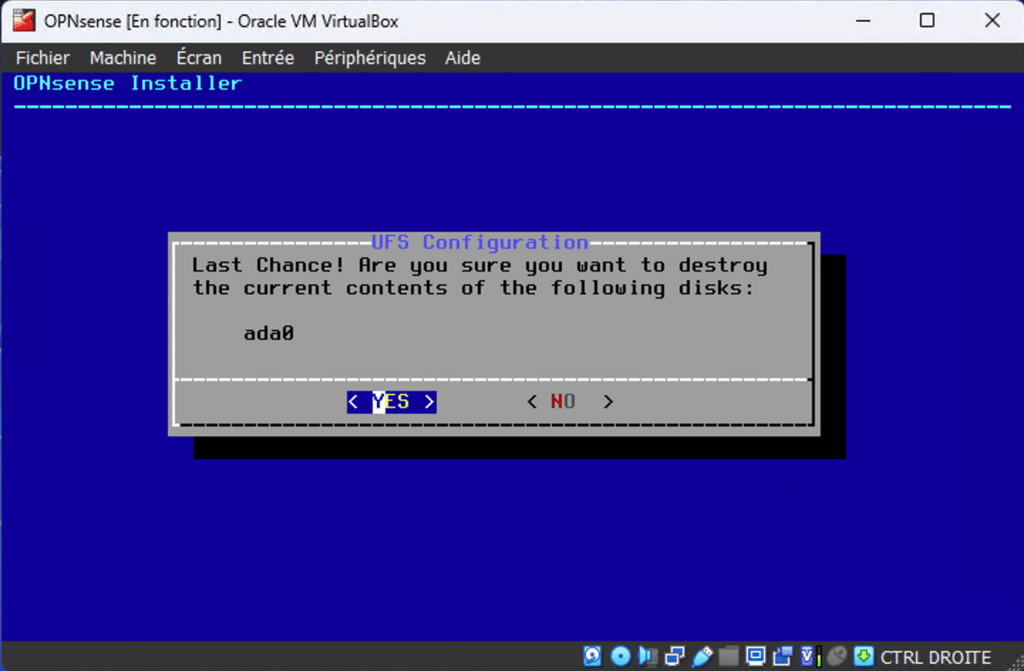
Select the installation disk and answer Yes.
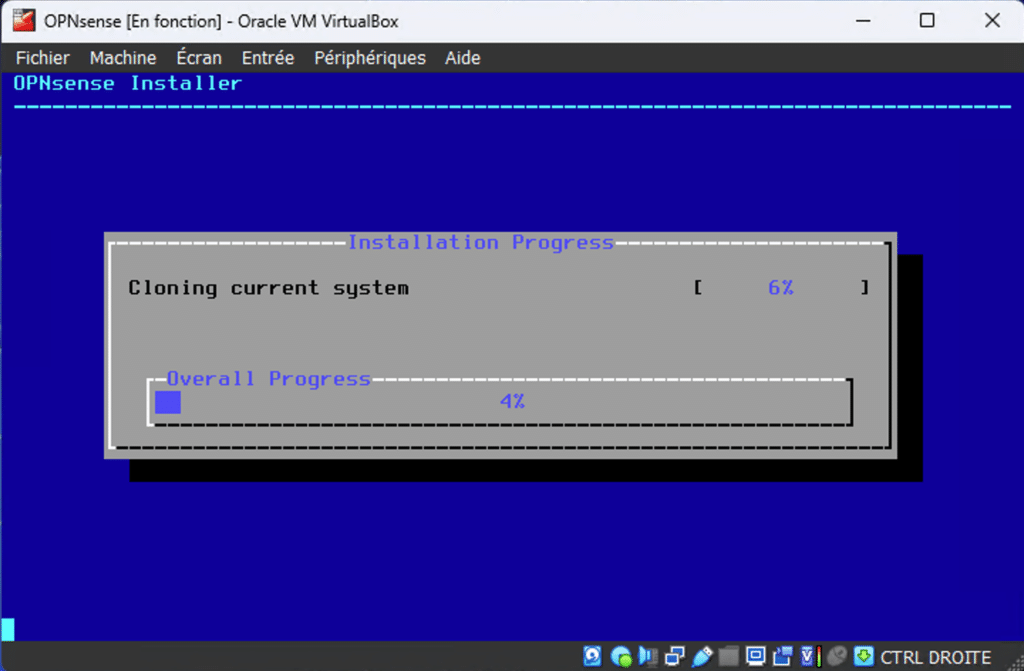
Wait for the installation to finish, then restart the machine. Make sure you remove the installation disk, otherwise it will restart in installation mode.
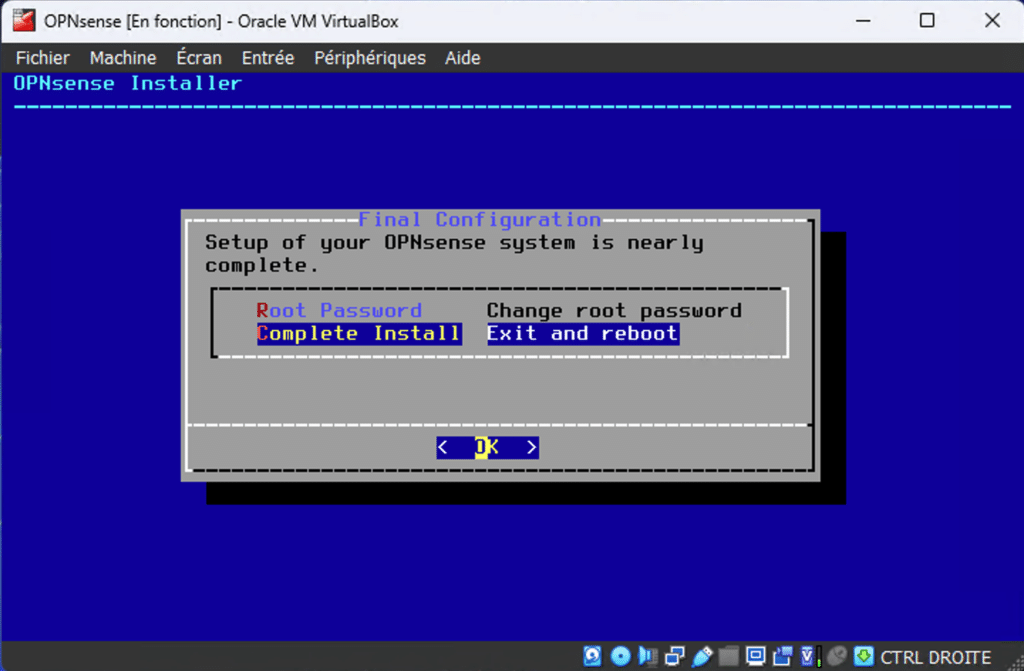
Once installed, log in with the default root account and password opnsense.

Now you can configure the network interfaces on OPNsense.
Step 4: Configuring network interfaces on OPNsense
Now that you’ve installed OPNsense on your virtual machine, the next step is to configure the network interfaces to enable appropriate connectivity and routing.
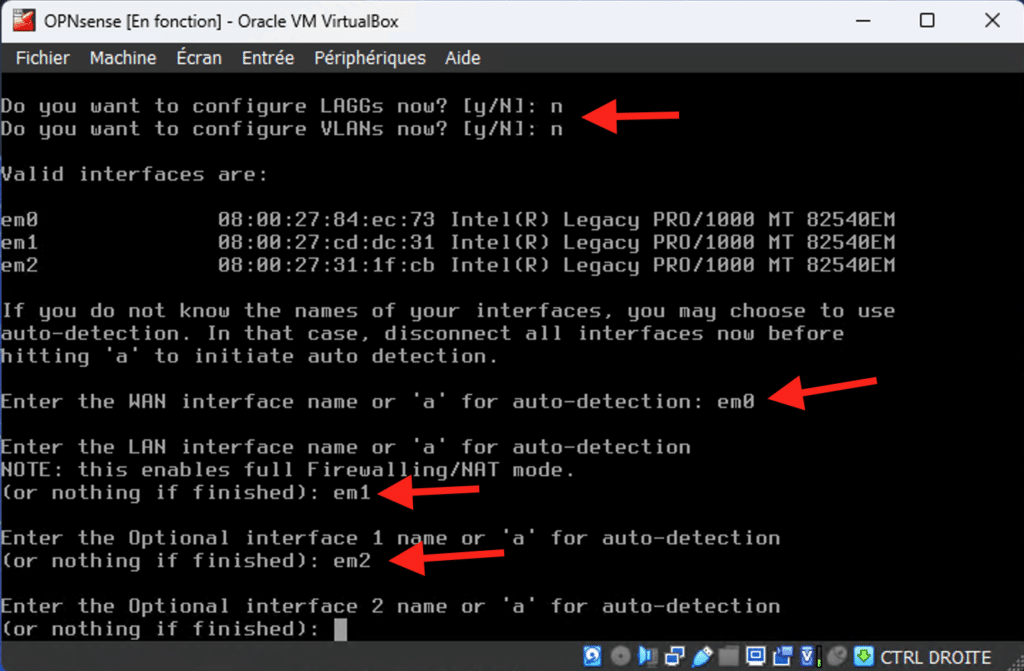
Log in and press 1 to start configuration. Follow the instructions.
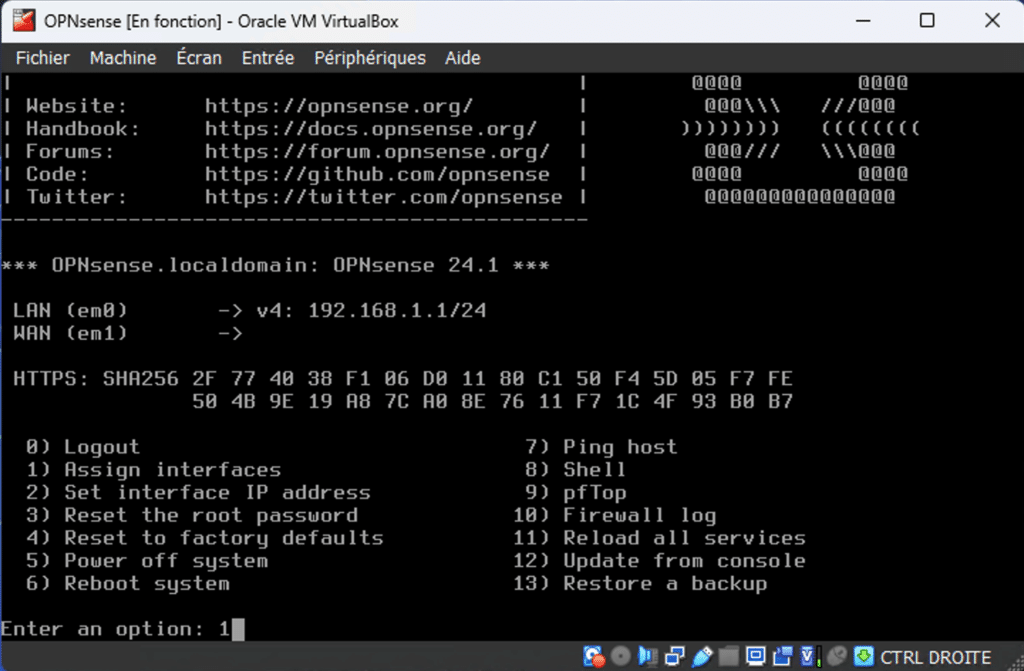
Assign interfaces according to your needs.
Then apply the changes.
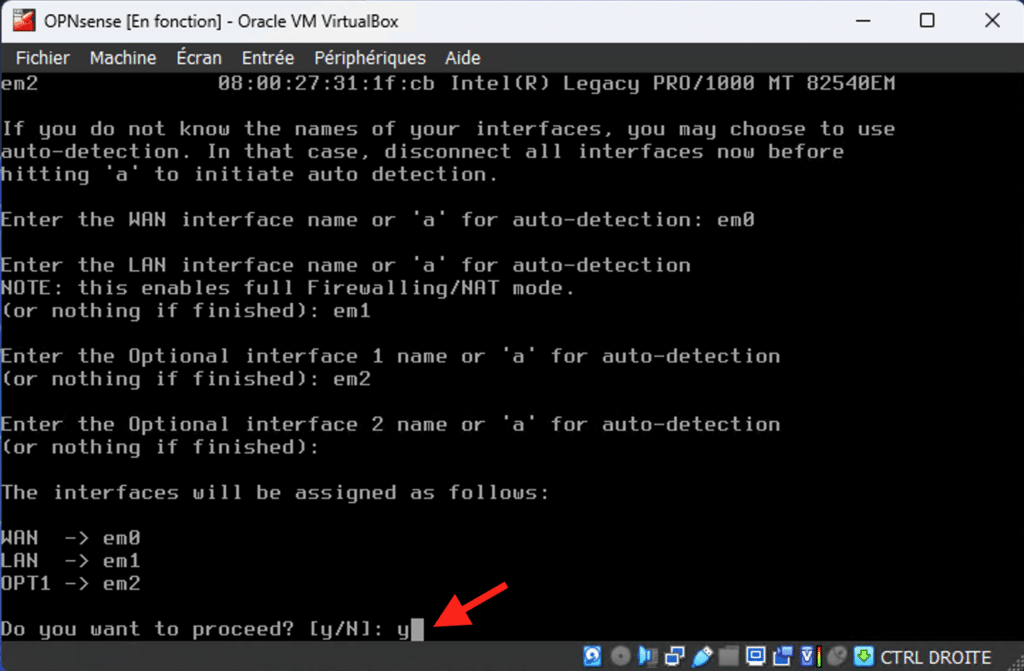
Wait a few seconds for the settings to take effect.
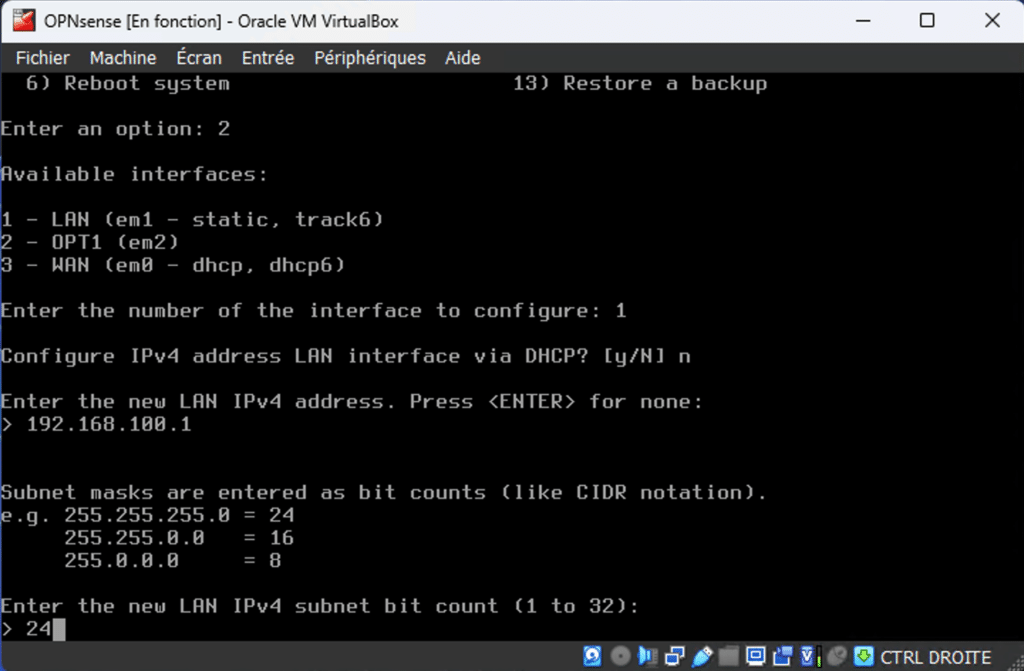
Now we’re going to configure the IP addresses. Press 2 to start configuration. Follow the instructions.
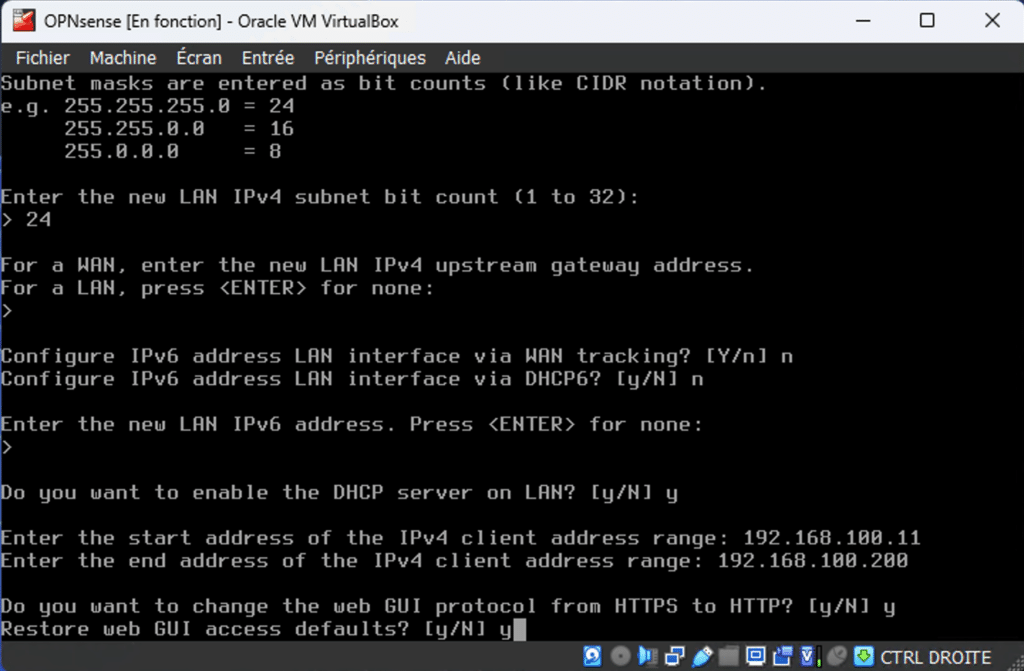
Step 5: Access the OPNsense web interface
Now that you’ve configured the network interfaces in OPNsense, you can access its web interface to manage and monitor your firewall.
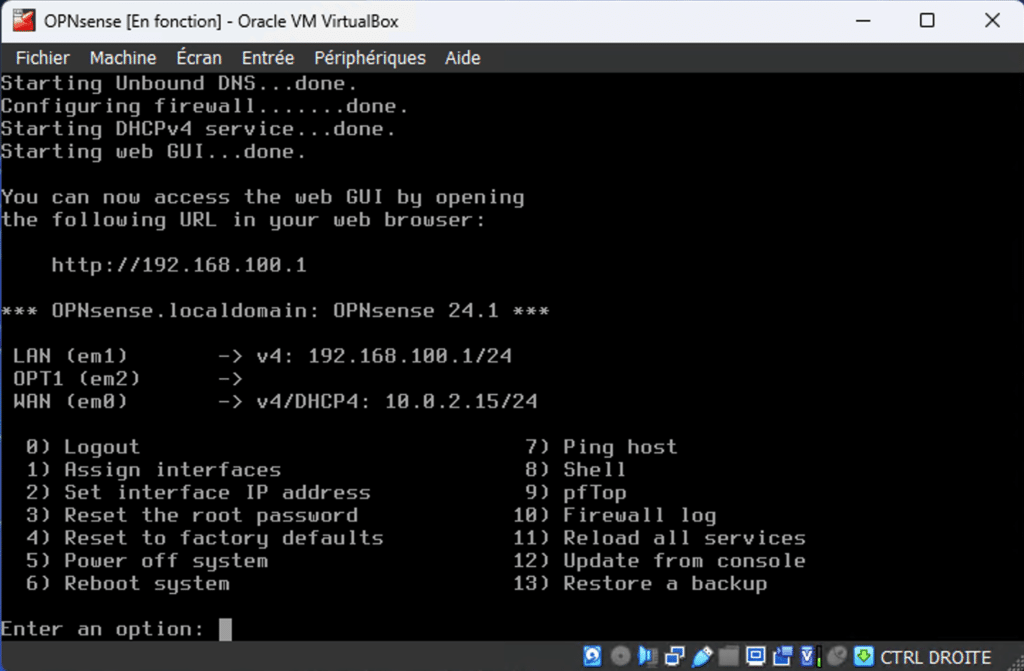
On your web browser, enter the IP address assigned to the LAN interface of your OPNsense virtual machine.
By default, this address is usually 192.168.1.1, but it may vary depending on your network configuration. In our case, our address is 192.168.100.1.
Press ‘Enter’ to access this address. This should open the OPNsense web interface login page.
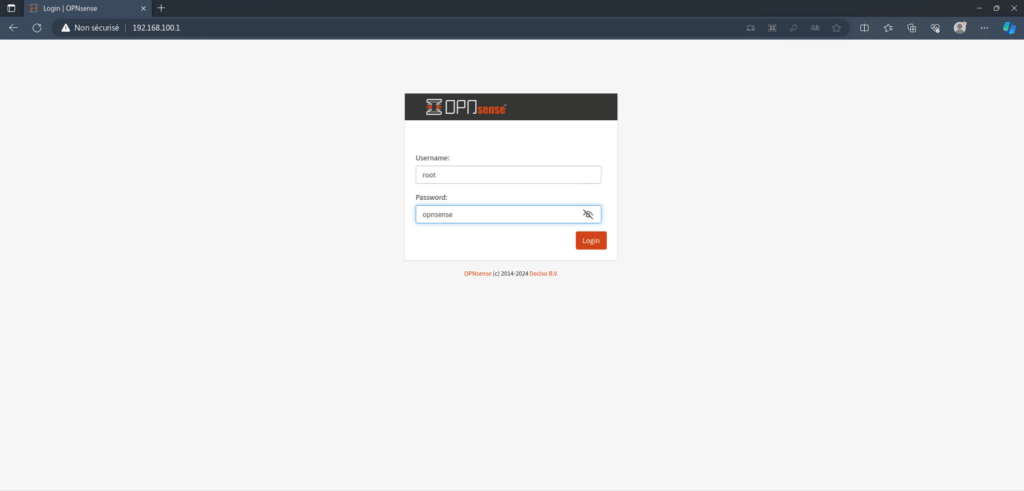
Enter the default login credentials, which are usually ‘root’ for the username and ‘opnsense’ for the password.
If you customized these credentials during installation, use the information you configured instead.
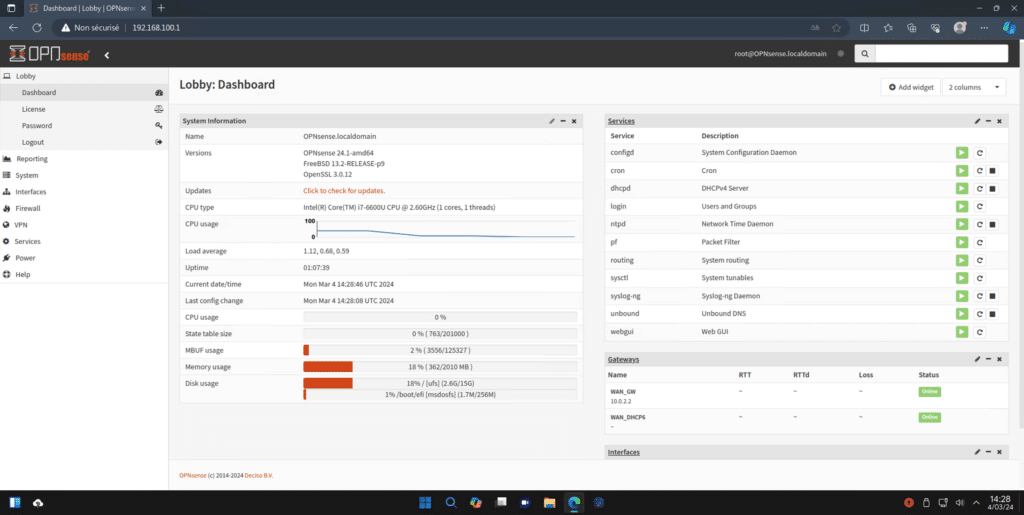
Once logged in, you’ll be presented with the OPNsense dashboard. You can access all firewall management functions, including firewall rule configuration, network traffic monitoring, interface management and much more.
Conclusion
In short, installing and configuring OPNsense on VirtualBox can be accomplished by following these simple steps. With OPNsense, you get a powerful, customizable firewall to secure your virtual network. Feel free to explore OPNsense’s features and capabilities for your network security needs.
FAQs
Can I install OPNsense on a hypervisor other than VirtualBox?
Yes, OPNsense can be installed on other hypervisors such as VMware, Hyper-V, or Proxmox.
What are the minimum hardware requirements for running OPNsense on VirtualBox?
For an optimal experience, we recommend allocating at least 1 GB RAM and 2 processor cores to the OPNsense virtual machine.
How can I access the OPNsense web interface from my browser?
Once OPNsense has been installed and configured, you can access its web interface by opening a browser and entering the IP address assigned to the LAN interface in the address bar.
Can I customize firewall rules in OPNsense?
Yes, OPNsense offers a user-friendly interface for configuring firewall rules, allowing you to define custom rules to control incoming and outgoing traffic.
Does OPNsense offer network monitoring?
Yes, OPNsense offers a variety of network monitoring tools, including real-time traffic graphs, detailed system logs, and security alerts to help you monitor and manage your network effectively.