When exploring the world of hypervisors for testing or experimentation, Proxmox VE often stands out as a powerful solution. Although Proxmox VE is generally deployed as a stand-alone hypervisor. Some users may wish to install it in a virtualization environment such as VirtualBox. In this article, we’ll guide you through the process of installing Proxmox VE on VirtualBox.
Proxmox VE installation requirements
If you plan to test with Proxmox VE, the minimum recommended hardware configuration is as follows:
- Processor :
- 64-bit (Intel EMT64 or AMD64).
- Intel VT/AMD-V compatible processor/mainboard for full KVM virtualization support.
- Memory :
- Minimum 1 GB RAM.
- Storage :
- Adequate disk space.
- Network :
- A network interface card (NIC).
Here are the steps for installing Proxmox VE on VirtualBox :
Step 1: Download the Proxmox VE ISO image
The first step in installing Proxmox VE is to download the ISO image from the official Proxmox website. Follow these steps to obtain the necessary file:
Click here to visit the official Proxmox website.
On the home page, look for the “Download” section and click on it.
Wait until the download is complete. The duration will depend on the speed of your Internet connection and the size of the ISO file.
Step 2: Creating a Virtual Machine in VirtualBox
After downloading the Proxmox VE ISO image, the next step is to create a virtual machine in VirtualBox to install Proxmox VE.
Follow these steps to configure your virtual machine:
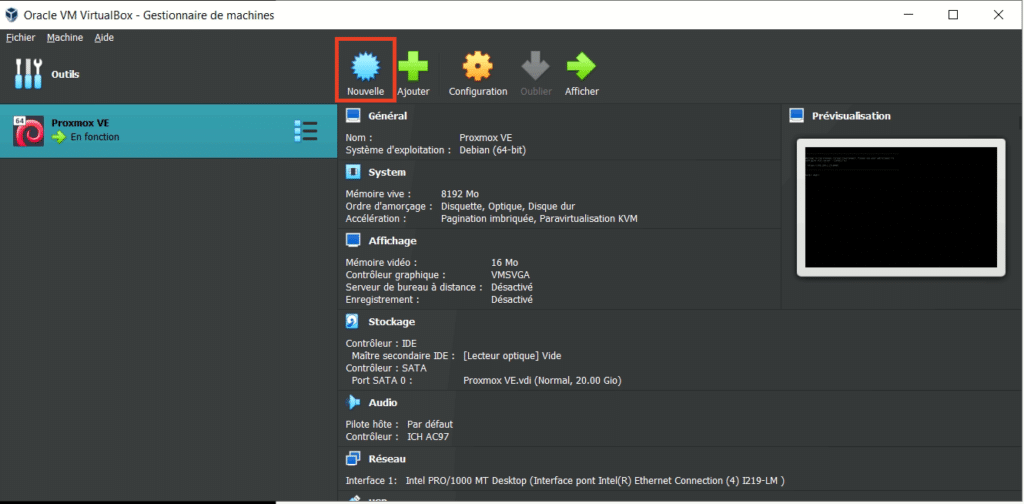
Launch the VirtualBox application on your computer.
Click on the “New” button to create a new virtual machine.
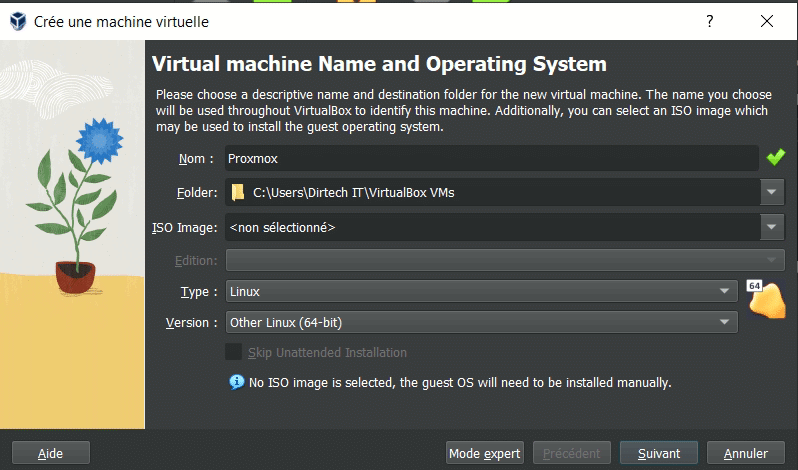
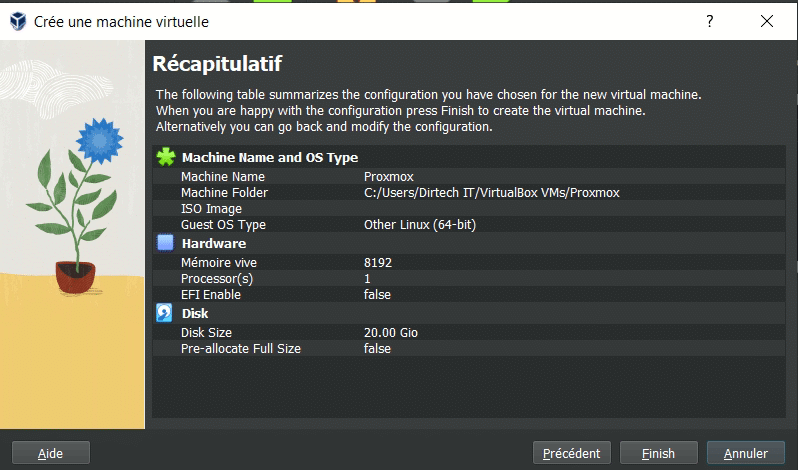
In the creation window, enter a name for your virtual machine, choose the type “Linux”, and the version “Other Linux (64-bit)”.
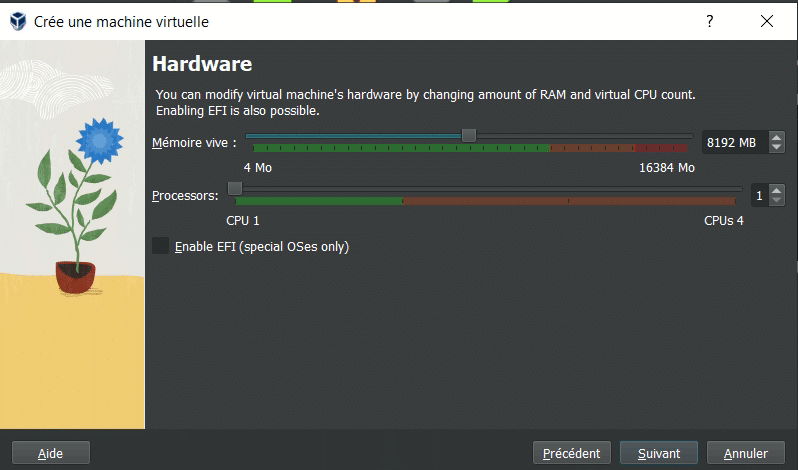
Select the amount of RAM you wish to allocate to your virtual machine.
Proxmox VE requires at least 2048 MB RAM.
Choose to create a virtual hard disk now and click “Create”.
Select the virtual hard disk size. For Proxmox VE, a space of at least 20 GB is recommended.
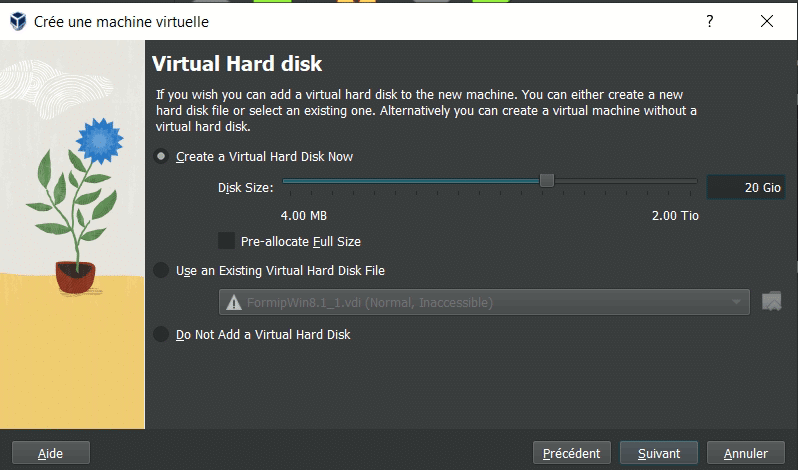
Click on Finish.
Step 3: Configure Virtual Machine parameters
Once the virtual hard disk has been created, select the newly created virtual machine and click on “Configuration”.
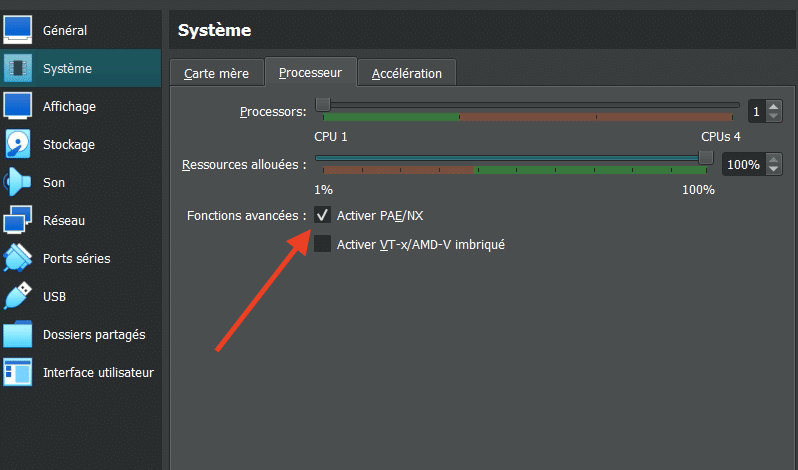
In the “System” tab, make sure that “Enable EFI boot” is deactivated. Then, in Processor, Activate PAE/NX.
In the “Network” tab, select the network access mode: Bridge access.
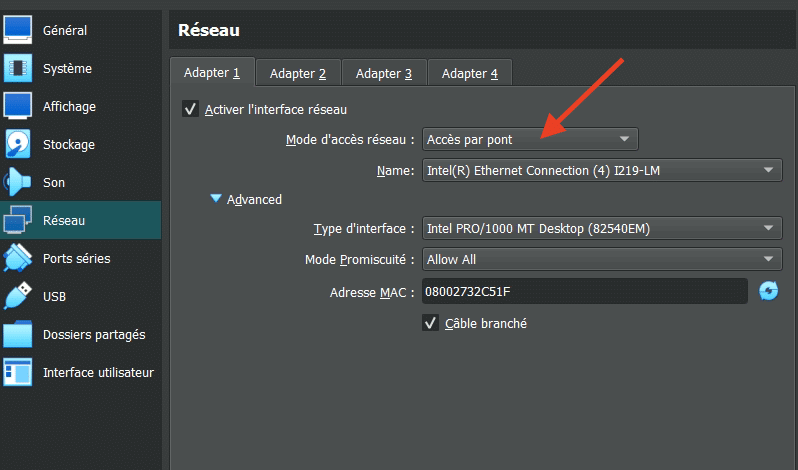
Click on Ok to save your settings.
Step 4: Starting up the Virtual Machine
Click on “Start” to launch the virtual machine.

Click on the small triangle to select the ISO you have downloaded.
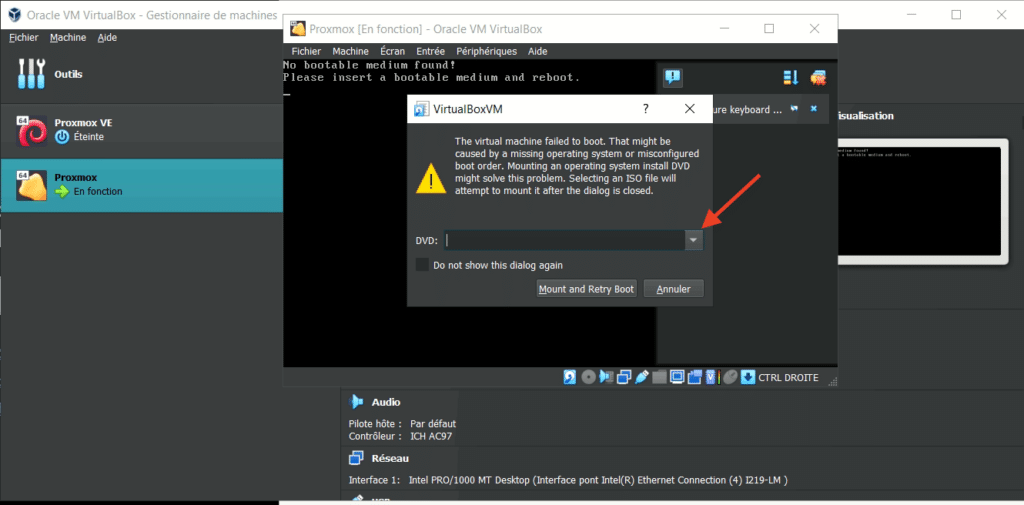
Continue by clicking on Mount and Retry Boot.

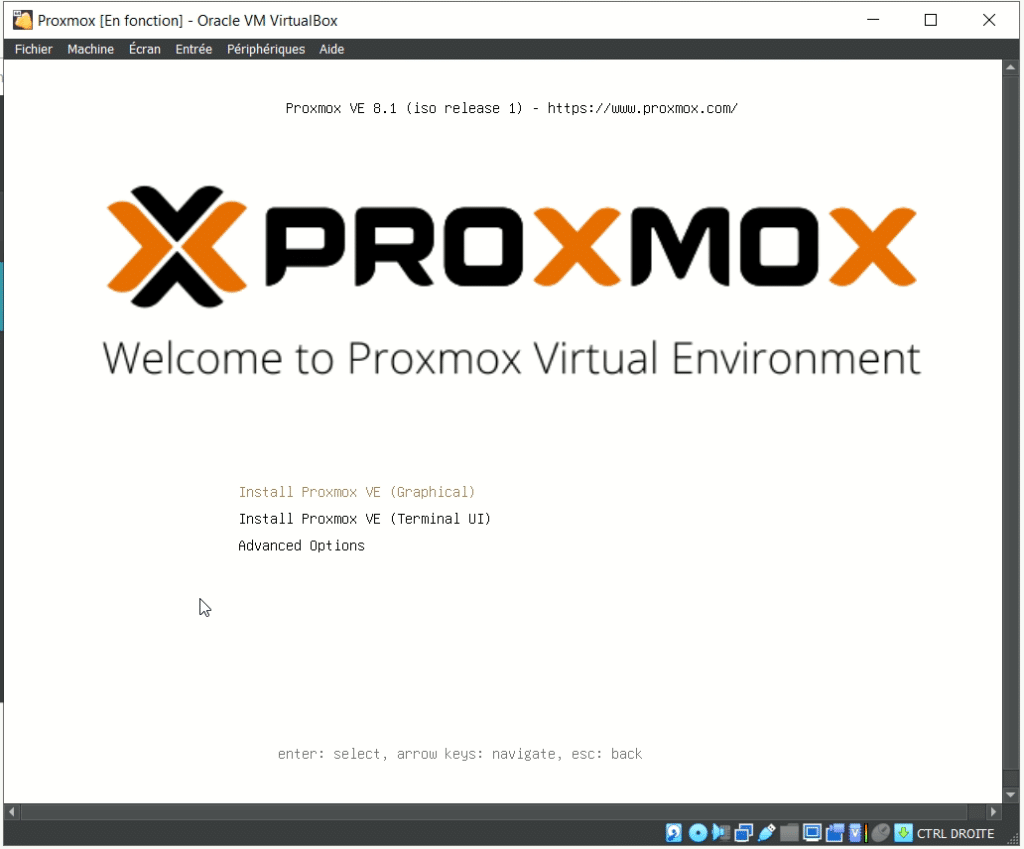
Step 5: Installing Proxmox VE
Select Proxmox VE installation in graphic mode.
Accept the license and terms of use.
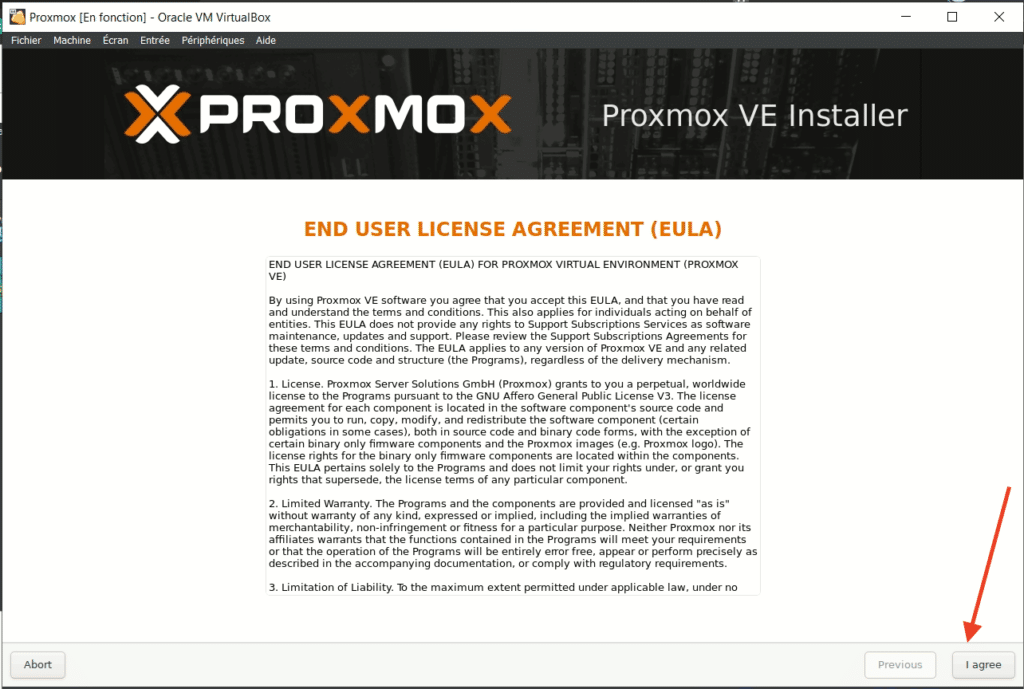
Then click on Next.
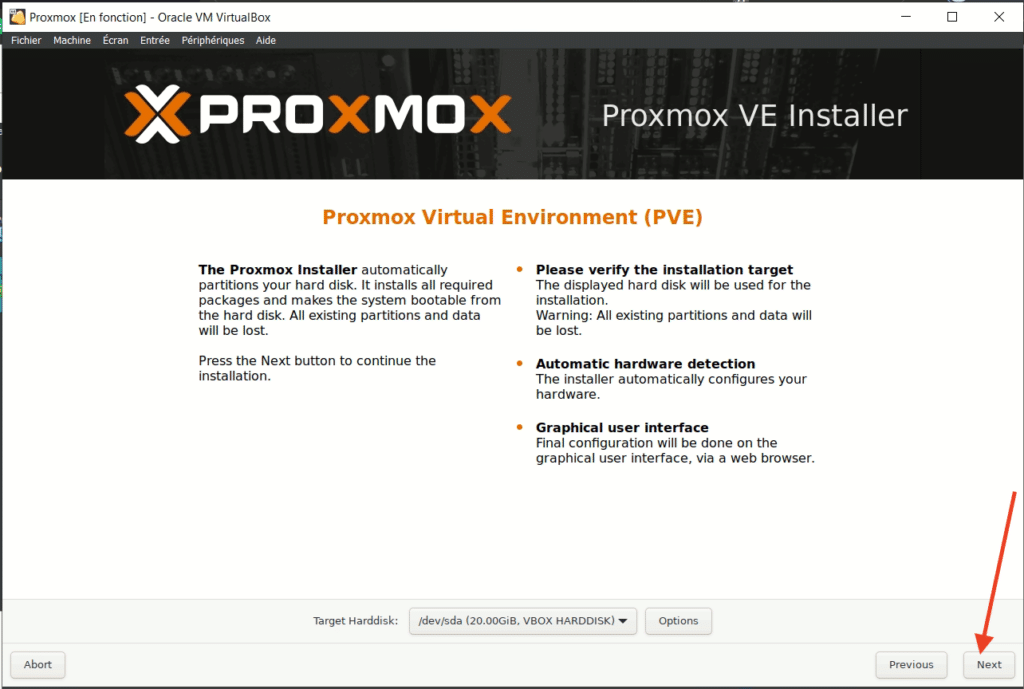
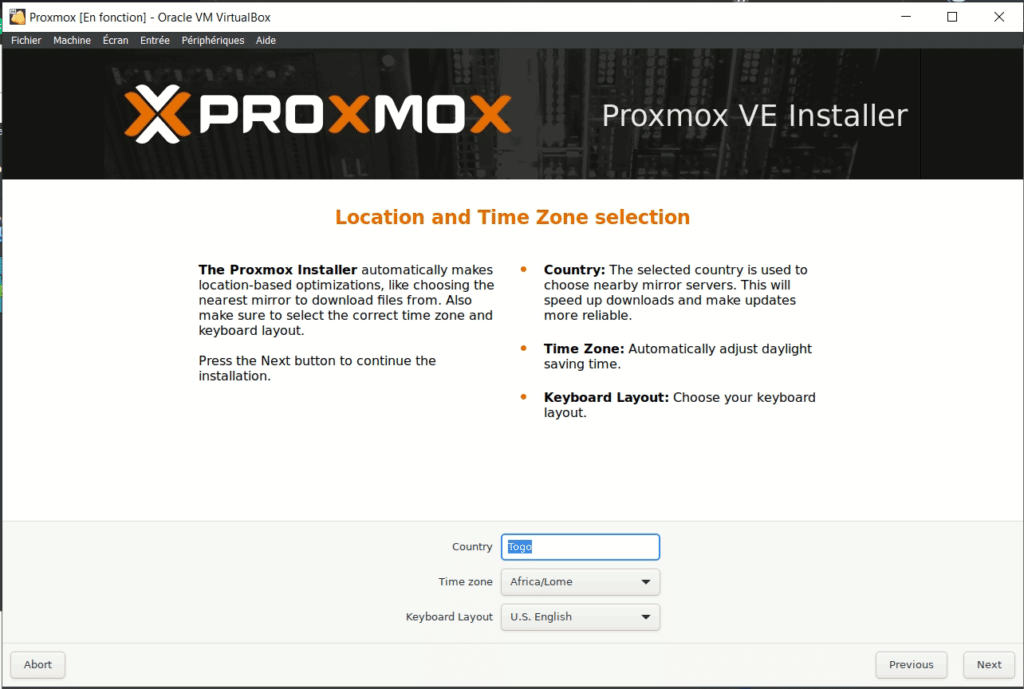
Select your country and time zone.
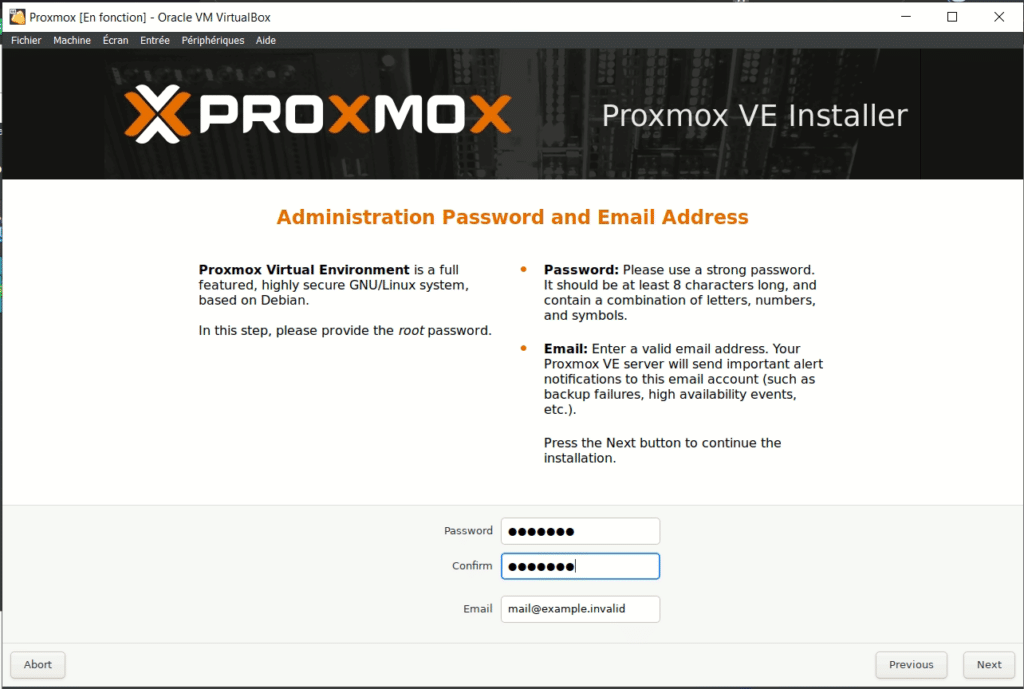
Create Proxmox user password.
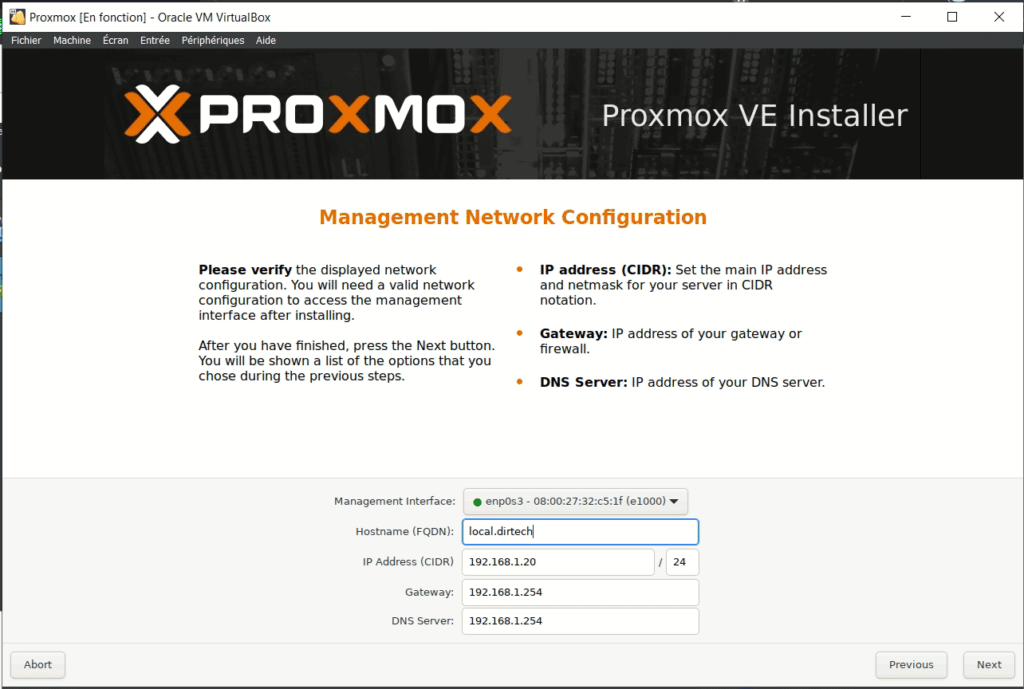
Then give a Hostname.
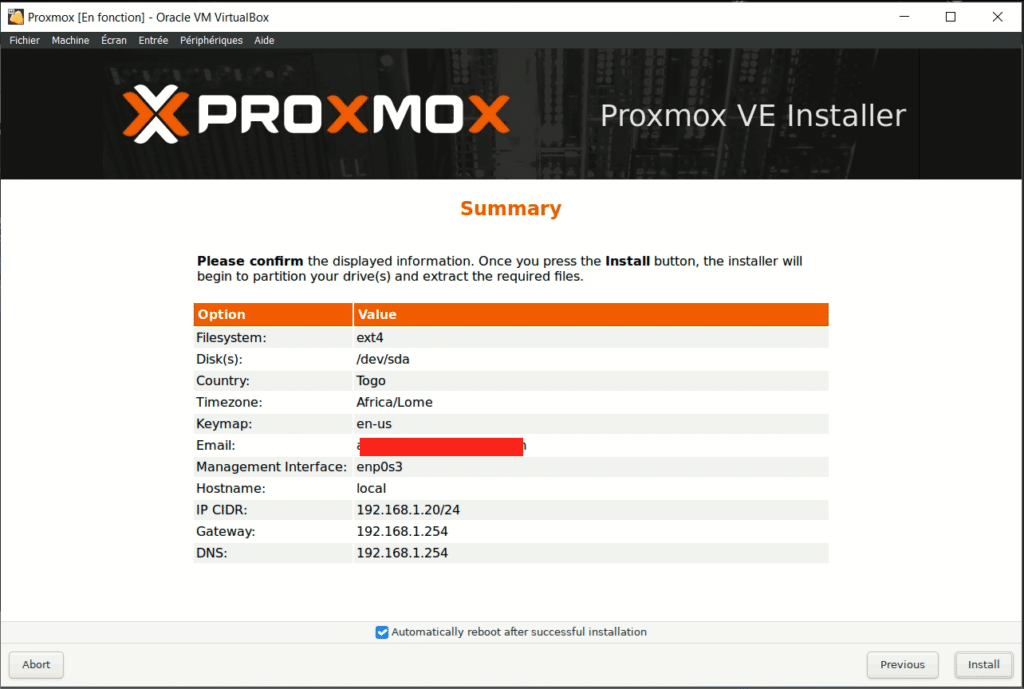
Click Install to start Proxmox installation.
Installation will take just a few minutes. So you’ll just have to wait.
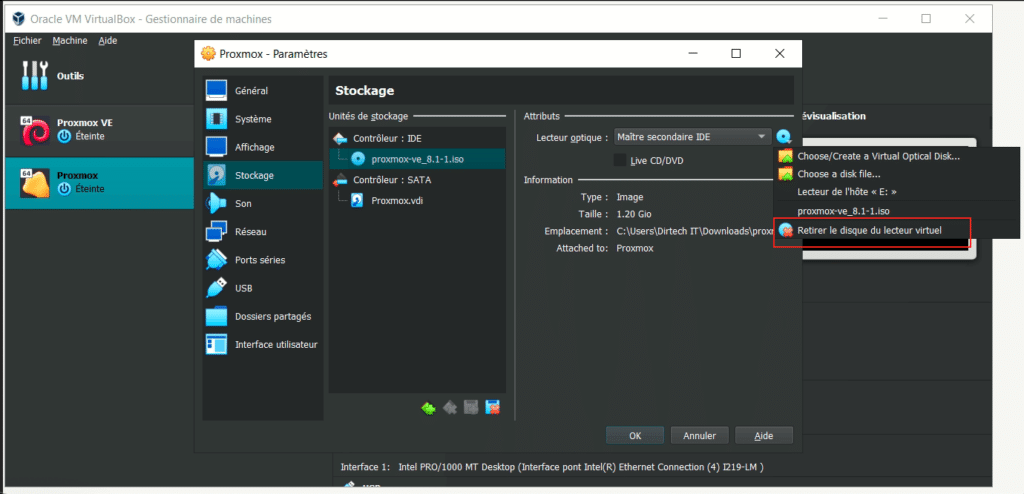
Once installation is complete, switch off the machine and remove the installation disk.
Go to configuration, then to the storage tab, in the controller, select the ISO file as shown in the screenshot below.
Step 6: Post-installation configuration
Once Proxmox VE has been installed on your virtual machine in VirtualBox, post-installation configuration is essential to ensure the environment runs smoothly.
See also: How do I install Zabbix Server on Ubuntu 22.04?
Restart the virtual machine after installation.
Once restarted, open a web browser on your host computer.
Enter the IP address assigned to your Proxmox VE virtual machine, followed by port 8006 in the browser address bar. See screenshot below.
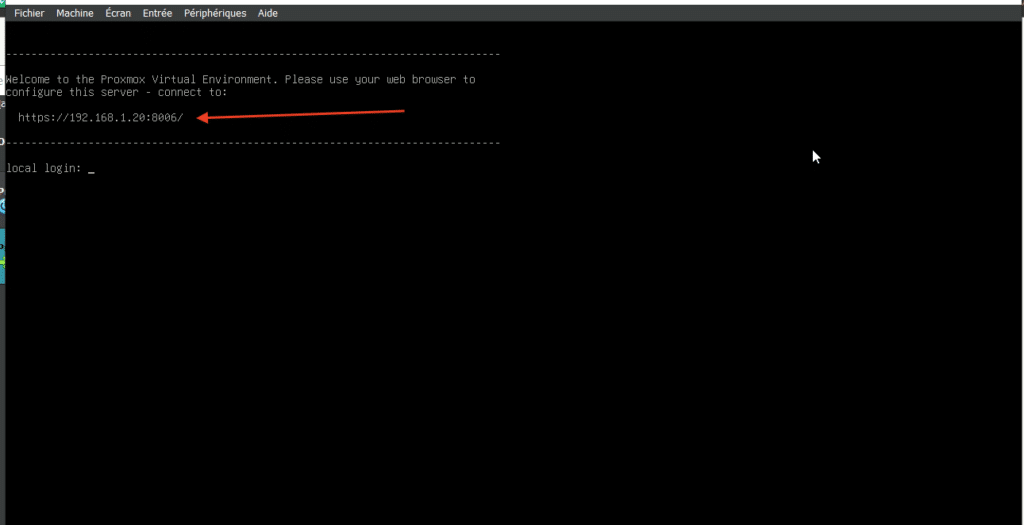
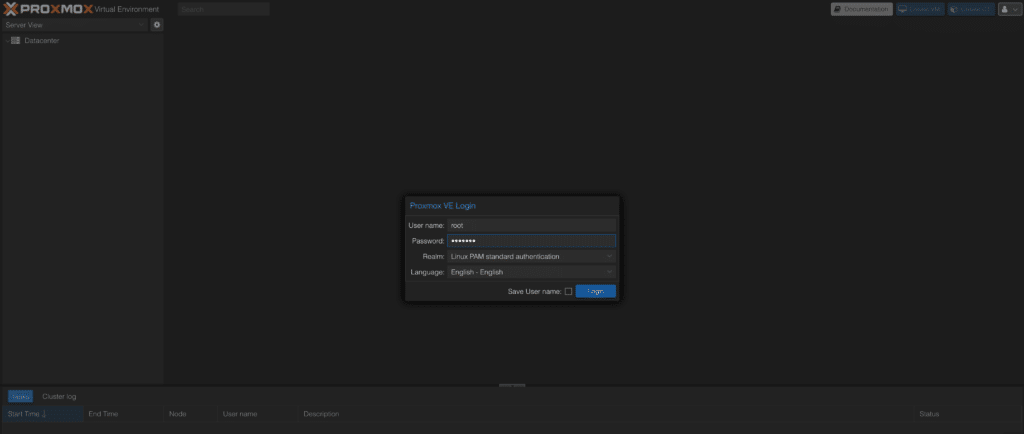
You will be redirected to the Proxmox VE web interface login page.
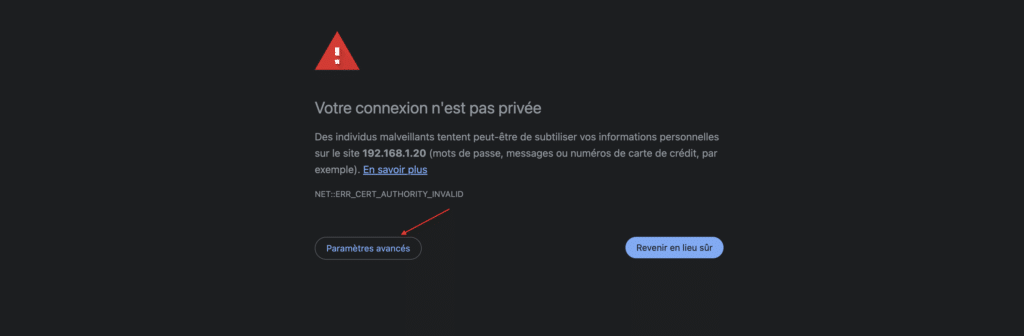
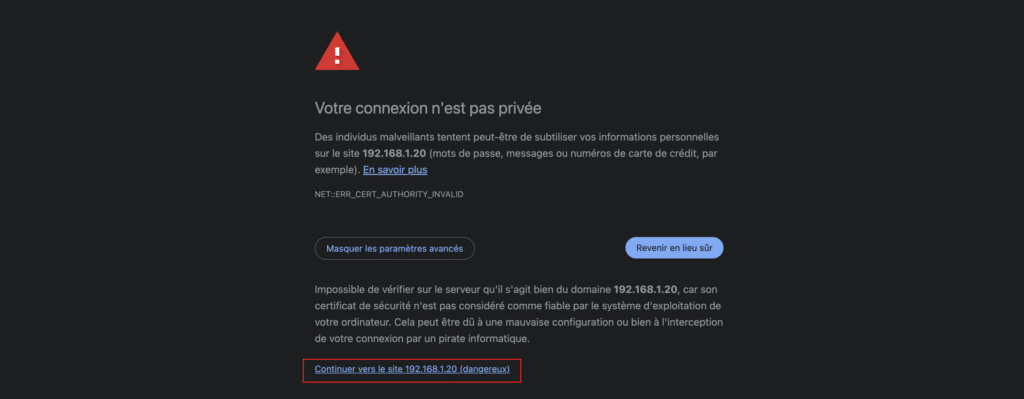
Click on advanced settings, then continue to the site.
Use the credentials you defined during the installation process to log in. The default username is root.
You’re now connected to Proxmox.
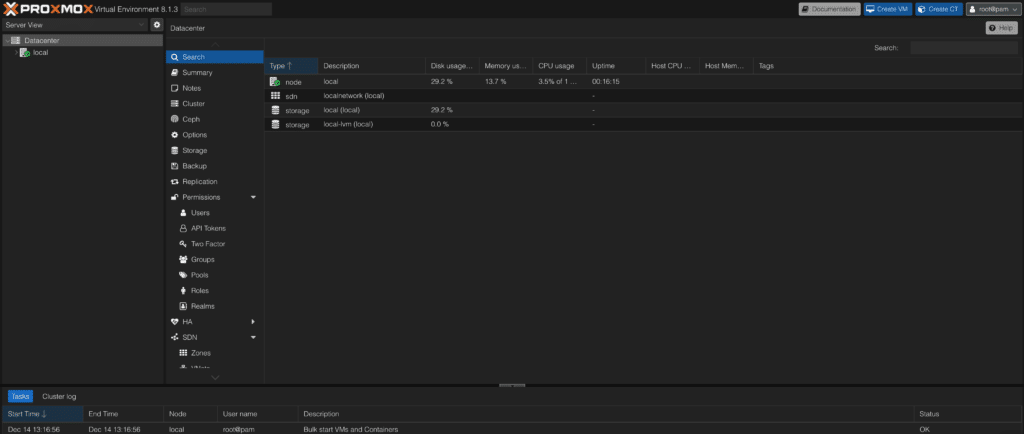
Explore the different sections to configure your Proxmox VE node according to your needs.
- Add Storage :
- Under the “Storage” tab, you can add different types of storage, such as local (DAS), SAN, NAS, Ceph, etc., depending on your configuration.
- Network configuration :
- Check and configure the network settings under the “Network” tab as required.
- Create Virtual Machines (VMs) or Containers :
- Under the “Virtual Machine” or “Containers” tab, you can start creating virtual machines or containers according to your requirements.
- Exploring the Documentation :
- Familiarize yourself with the official Proxmox VE documentation, available at https://pve.proxmox.com/wiki/Main_Page, for detailed information on advanced configuration.
Conclusion
In short, installing Proxmox VE on VirtualBox offers a practical solution for exploring the functionalities of this virtualization platform. By following the steps from virtual machine creation to post-installation configuration, you can quickly set up a virtual environment for testing and experimentation.
FAQs
What is Proxmox VE?
Proxmox Virtual Environment (VE) is an open-source virtualization platform that combines container-based virtualization (LXC) and full virtualization (KVM). It offers centralized management of virtual machines and containers via a user-friendly Web interface.
Why install Proxmox VE on VirtualBox?
Installing Proxmox VE on VirtualBox is often used for testing and experimentation. This allows users to discover Proxmox VE functionalities in a virtual environment, without the need for dedicated hardware.
Is VirtualBox suitable for production deployment of Proxmox VE?
No, VirtualBox is generally not recommended for production deployment. Proxmox VE is designed to be deployed on dedicated hardware or in professional virtualization environments to ensure optimum performance and high reliability.
How do I access the Proxmox VE web interface after installation?
Open a web browser and enter the IP address assigned to your Proxmox VE virtual machine, followed by port 8006 in the address bar. This will take you to the web interface, where you can log in with the credentials you defined during installation.
Does Proxmox VE support container-based virtualization (LXC)?
Yes, Proxmox VE supports container-based virtualization (LXC) in addition to full virtualization (KVM). This means greater flexibility when deploying applications in lightweight containers.