How to install Docker on macOS?
Docker is a tool for running certain applications in software containers. It allows you to create lightweight, portable containers for applications, making it easy to deploy and manage them on different environments.
If you are a developer working on macOS, you may have encountered difficulties when installing Docker on new Macs with Apple’s M1 or M2 processors.
In this article, we will see through the steps to install Docker on macOS.
Check processor compatibility with Docker
The first step before installing Docker on a MacBook Pro M1 or M2 is to check the processor’s compatibility with Docker.
Indeed, Docker is not yet officially supported on M1 and M2 processors. However, there is an experimental version that works well on these processors.
To check if your processor is compatible with Docker, you can run the following command in the terminal:
uname -mIf the answer is “arm64“, it means that you have an M1 or M2 processor, which is based on an ARM architecture.

In this case, you can continue with the Docker installation by following the steps described below.
Install Docker on macOS M1, M2
Here are the steps to install Docker on macOS M1, M2 :
Download the Docker Desktop for Mac installation package from the official Docker website.
As of Docker Desktop 4.3.0, Docker has removed the strict requirement to install Rosetta 2.
So there are some optional command line tools that still require Rosetta 2 when using Darwin/AMD64.
However, to get the best experience, Docker Inc recommends that you install Rosetta 2. To install Rosetta 2 manually from the command line, run the following command:
softwareupdate --install-rosetta
Double-click on the downloaded package to start the Docker installation.
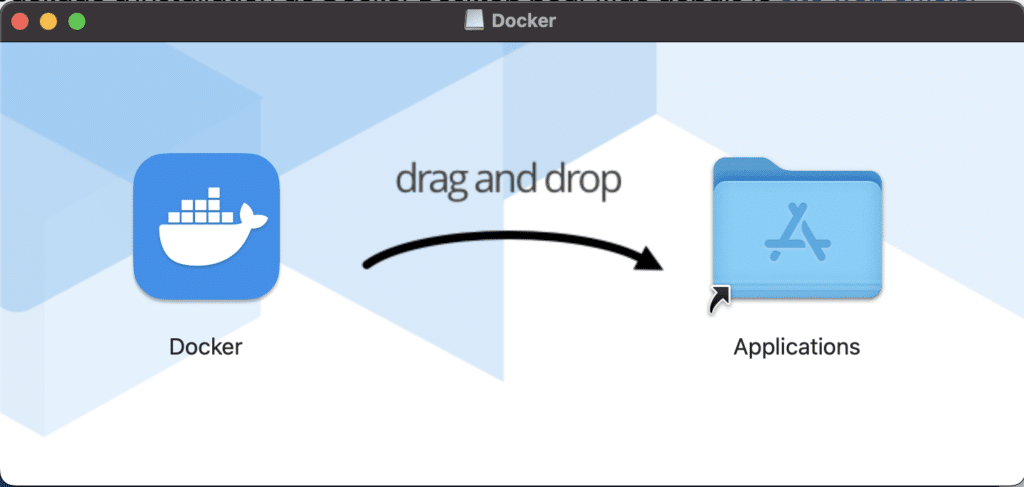
In the installation window, drag the Docker icon to the Applications folder.
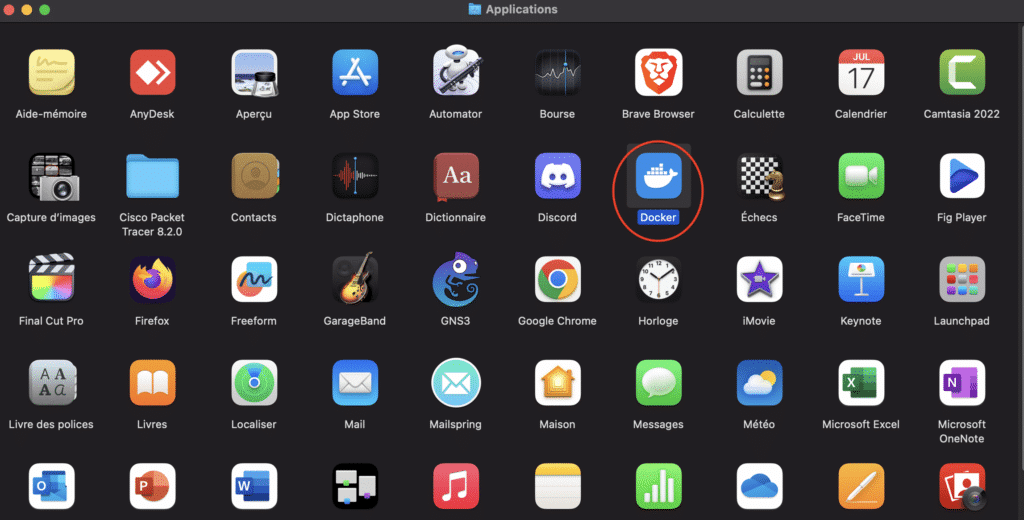
Find and launch Docker by double-clicking the icon in the Applications folder.
When you launch Docker for the first time, you will be asked to confirm that you want to install the Apple Silicon version of Docker.
Then follow the on-screen instructions to create a Docker account, if you don’t already have one.
Once you have created a Docker account, you will be prompted to log in to Docker Desktop.
How to install GNS3 GUI on macOS, MacBook M1 and M2?
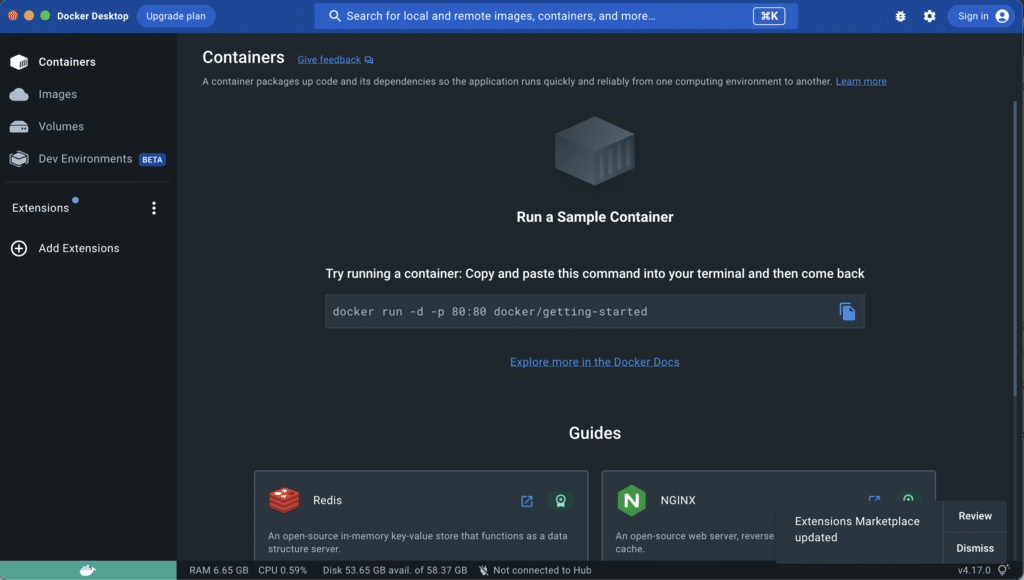
Check the installation of Docker
After installing Docker, it is important to check that everything is working properly. To do this, we will run a simple command to verify that Docker is running.
Open your terminal.
Type the following command and press Enter:
docker run hello-worldWait for Docker to download and run the “hello-world” image. If everything is working properly, you should see a message saying “Hello from Docker!” followed by information about the downloaded image.
This confirms that Docker is correctly installed and running on your system. You are now ready to start using Docker to create and run containers.
Uninstall Docker on macOS M1, M2
To uninstall Docker Desktop, you have two options:
Go to the Applications folder and delete docker, for this you need to stop docker services before proceeding.
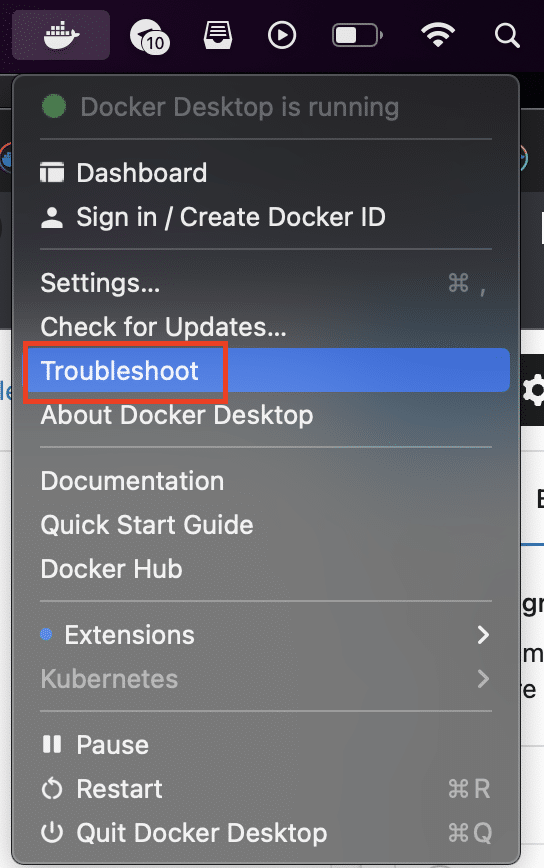
Or in the Docker menu of the menu bar, select Troubleshoot.
Select Uninstall
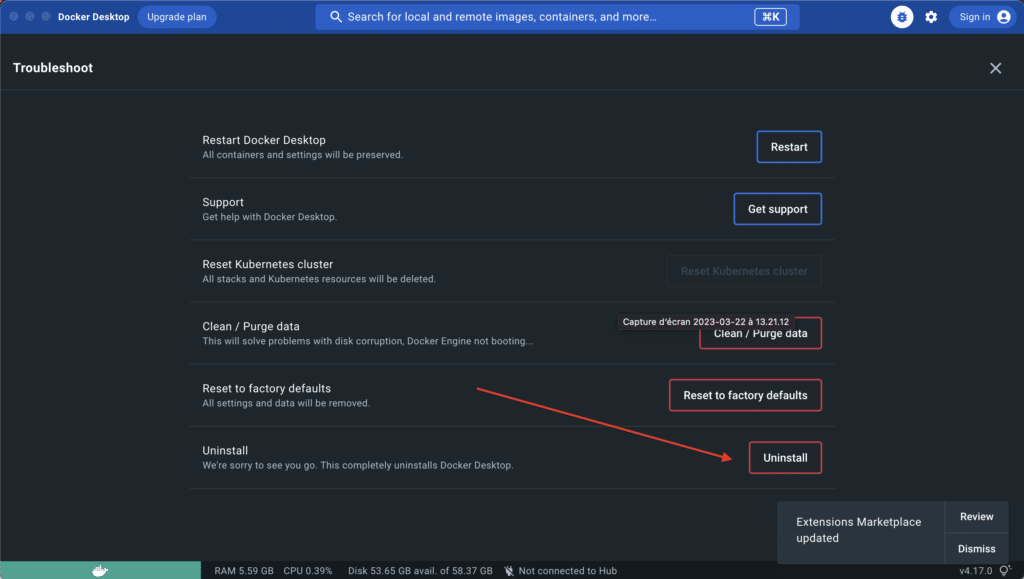
Click Uninstall to confirm your selection.
Conclusion
Finally; installing Docker on macOS M1 or M2 may seem daunting at first, but thanks to this tutorial, you now have the necessary steps to do it successfully.
With Docker, you can create and run applications in isolated containers, which offers many advantages for developers and system administrators. Feel free to explore all the features and possibilities that Docker has to offer on your macOS M1 or M2.