If you’re a system administrator or Ubuntu server user, you know how tedious it can be to manage your system via the command line. That’s where Webmin comes in. Webmin is a powerful web administration interface that lets you manage your Ubuntu server intuitively, through a user-friendly graphical interface.
In this guide, we’ll show you how to install and configure Webmin on your Ubuntu server, to simplify system management and save valuable time.
What is Webmin?
Webmin is an open source system administration tool designed to simplify the management of Unix and Linux servers via a web interface. It offers a wide range of functions, including management of users, services, network, files, software packages and much more.
With Webmin, you can perform all common system administration tasks, without having to use the command line.
See also: Using RDP to connect to a Windows computer from Ubuntu
Install Webmin on Ubuntu
Step 1: System update
Before installing Webmin, we recommend that you update your Ubuntu system. This is to make sure you have the latest security updates and patches.
sudo apt update & sudo apt upgradeStep 2: Add the Webmin repository
To install Webmin, you must first add the Webmin repository to your list of Ubuntu software sources.
You can do this by creating a source list file for Webmin in the /etc/apt/sources.list.d/ directory.
echo "deb https://download.webmin.com/download/repository sarge contrib" | sudo tee /etc/apt/sources.list.d/webmin.listStep 3: Add the GPG key
Next, you need to add the GPG key from the Webmin repository to verify the authenticity of the downloaded packages.
wget -q -O- http://www.webmin.com/jcameron-key.asc | sudo apt-key add -Step 4: Install Webmin
Once you’ve added the Webmin repository and GPG key, you can install Webmin.
But first, perform the updates:
sudo apt update & sudo apt upgradeThen install Webmin with the following command:
sudo apt install webminStep 5: Open port 10000 in UFW
To enable external access to the Webmin interface, you need to open port 10000 in UFW (Uncomplicated Firewall). You can do this by running the following command.
sudo ufw allow 10000Step 6: Access the Webmin interface
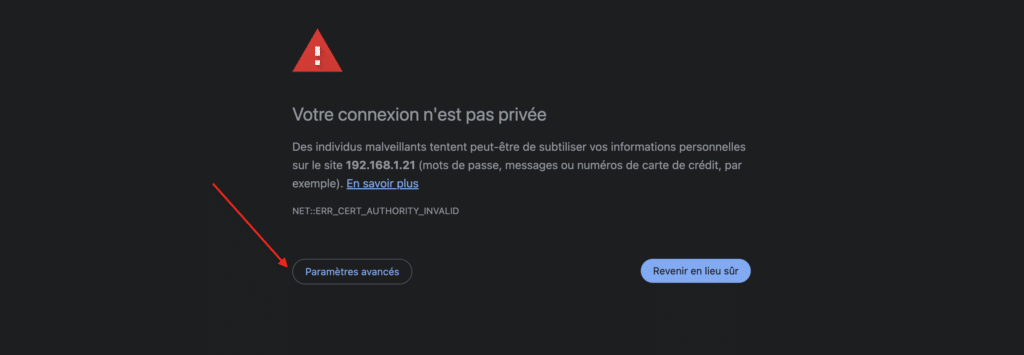
Once installation is complete and port 10000 is open in UFW. You can access the Webmin interface by opening your web browser and going to https://server_ip:10000. Replace server_ip with the IP address of your Ubuntu server.
Webmin configuration
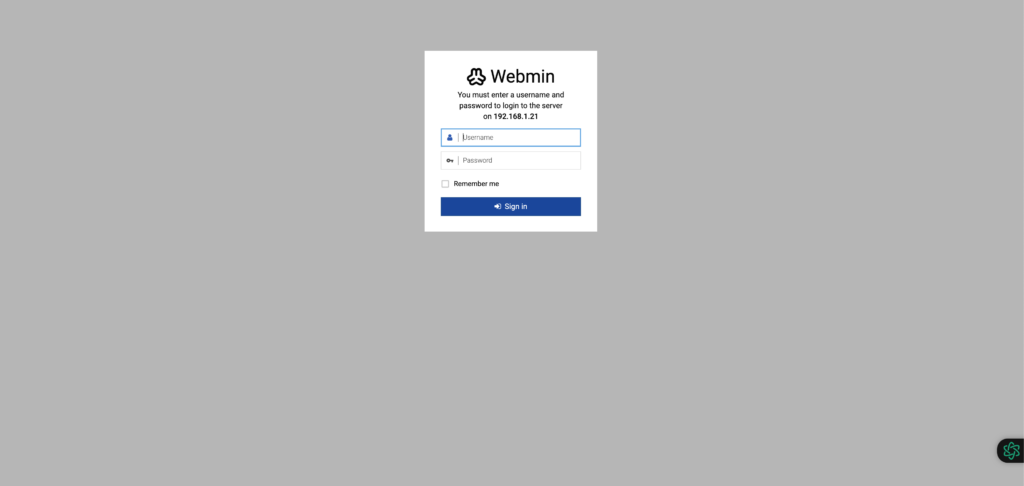
The first time you connect to the Webmin interface, you’ll be prompted to log in with the credentials for your user account on the Ubuntu server.
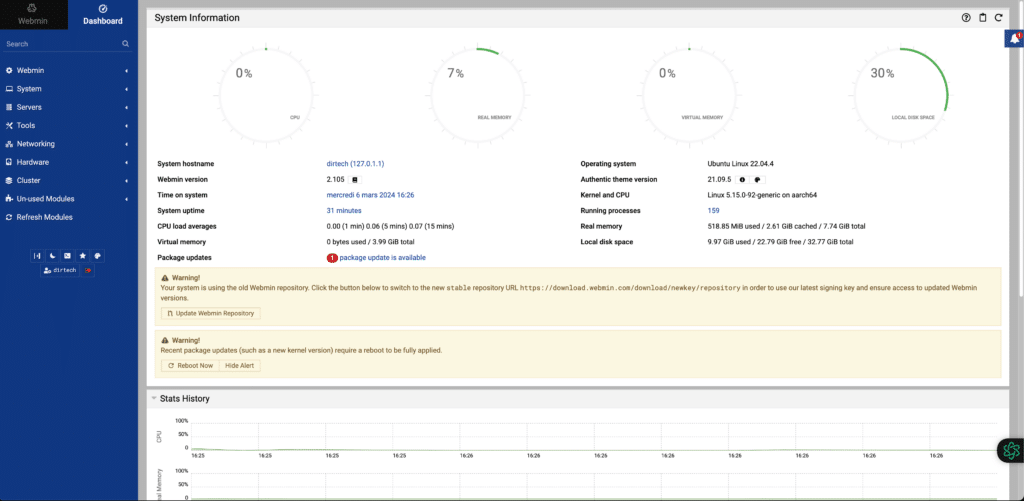
Once logged in, you’ll have access to an intuitive dashboard where you can manage all aspects of your Ubuntu server.
Conclusion
Webmin makes managing your Ubuntu server child’s play. Its user-friendly web interface lets you easily manage users, services, the network and much more, without having to use the command line.
So don’t hesitate to install Webmin on your Ubuntu server and simplify your life as a system administrator.